First ... why don't I just buy some charcoal at the local store? Well, most of this is in a pressed brick form, and is not pure wood product. It is too dirty to use in a forge (among other things). If you are careful, you can get real wood charcoal for about $5.00 per bag at Walmart. This is what I have been using recently, but I live on 20 acres of land in the country, and I would like to be a bit more self-sufficient. I collected the following links, but have not been able to try them out due to a burn ban in Oklahoma. The burn ban was recently lifted, so maybe I can give one of the simpler methods a try.
Here are the links and ideas about charcoal making that I have found recently.
Discovery has a good educational article on charcoal's benefits
Backwoods Home: Makeshift Forge and simple directions for Charcoal
Making charcoal in a 55 gallon drum.
Making charcoal by re-directing the volatiles down into the fire.
BBQ Charcoal Making
Arkansas Charcoal
If someone tries this out, be sure to take pictures and share your blog link, or just add a comment here.
May 08, 2006
March 28, 2006
March 2006 Saltfork Craftsmens Meeting
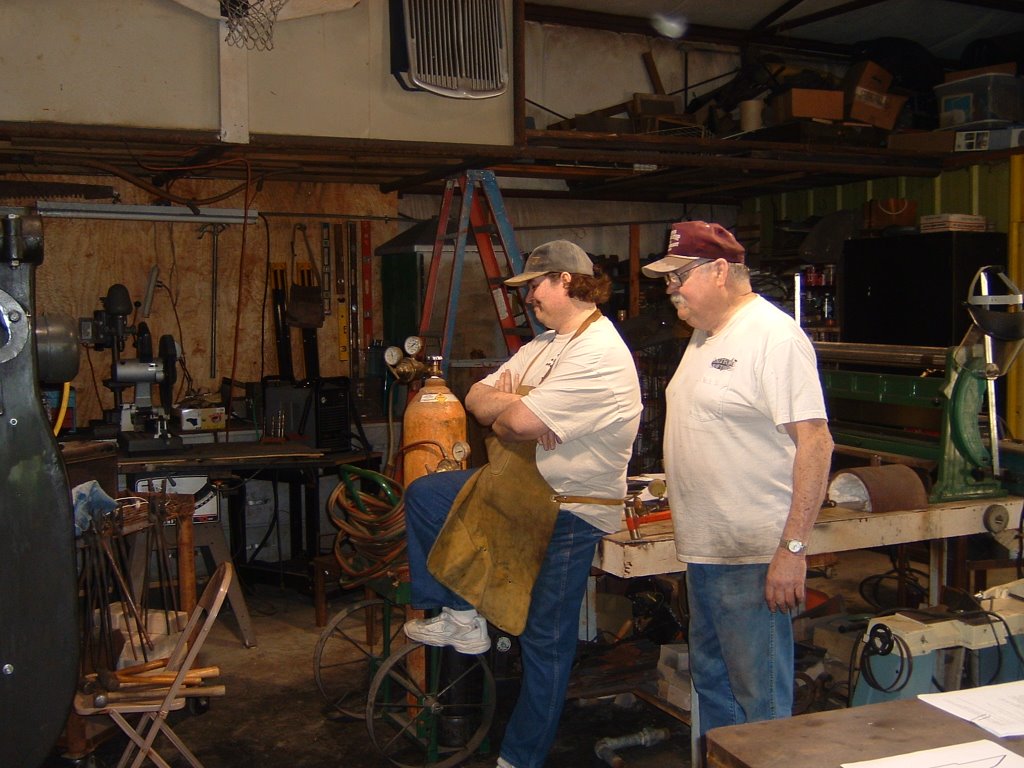
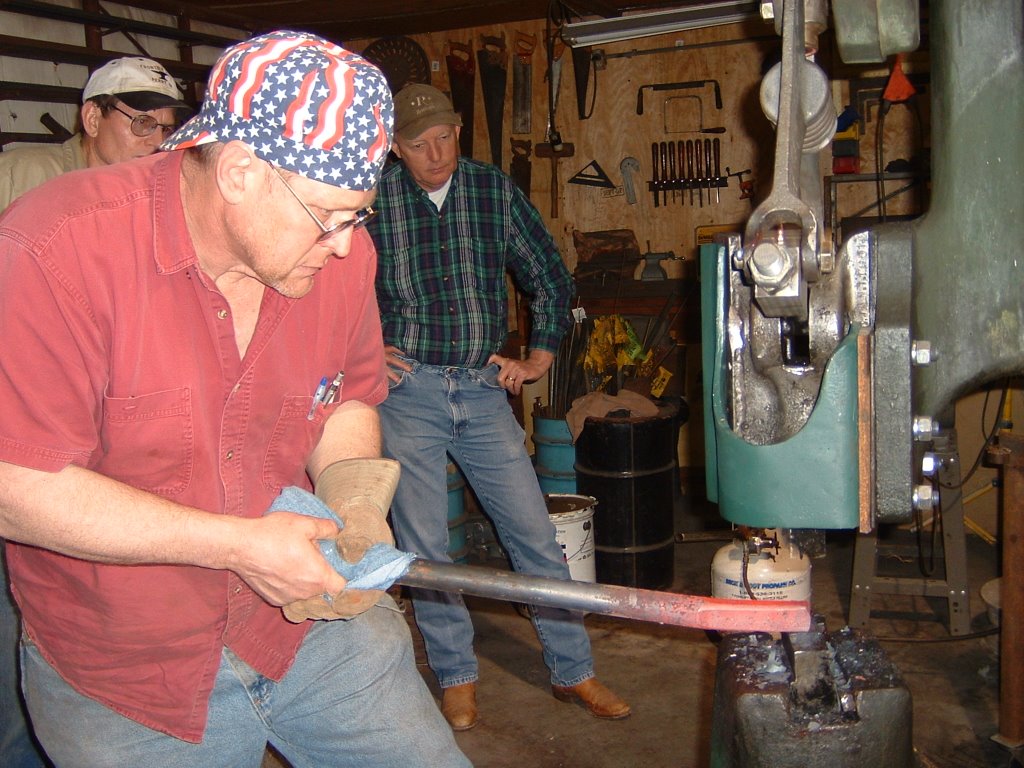
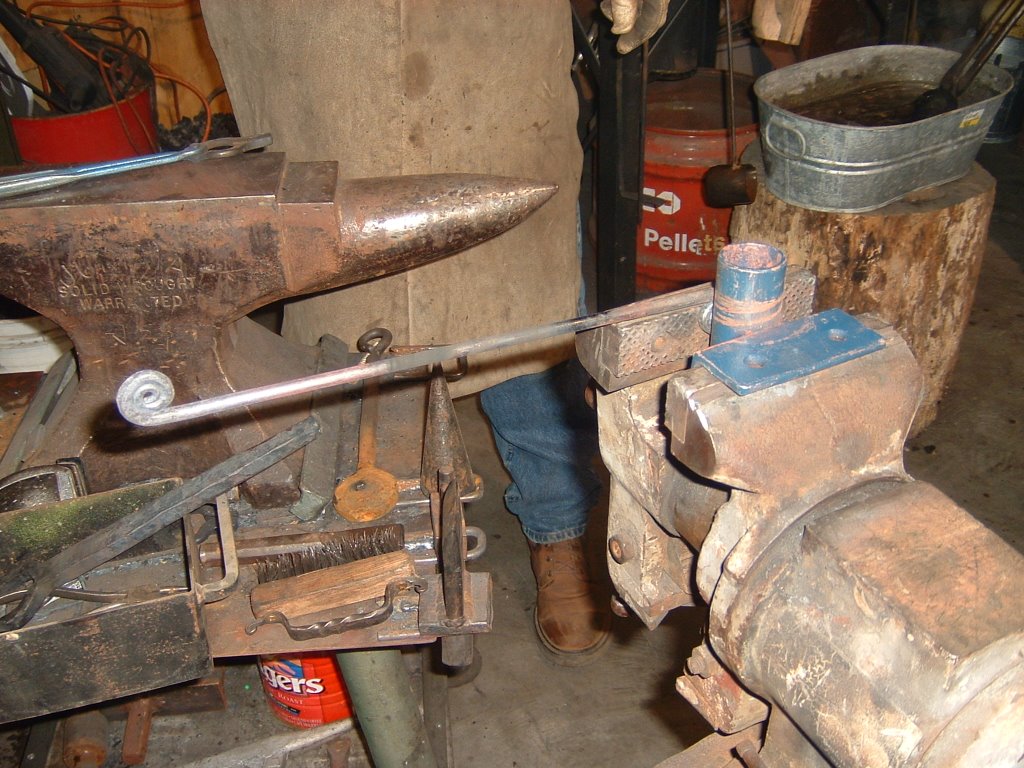
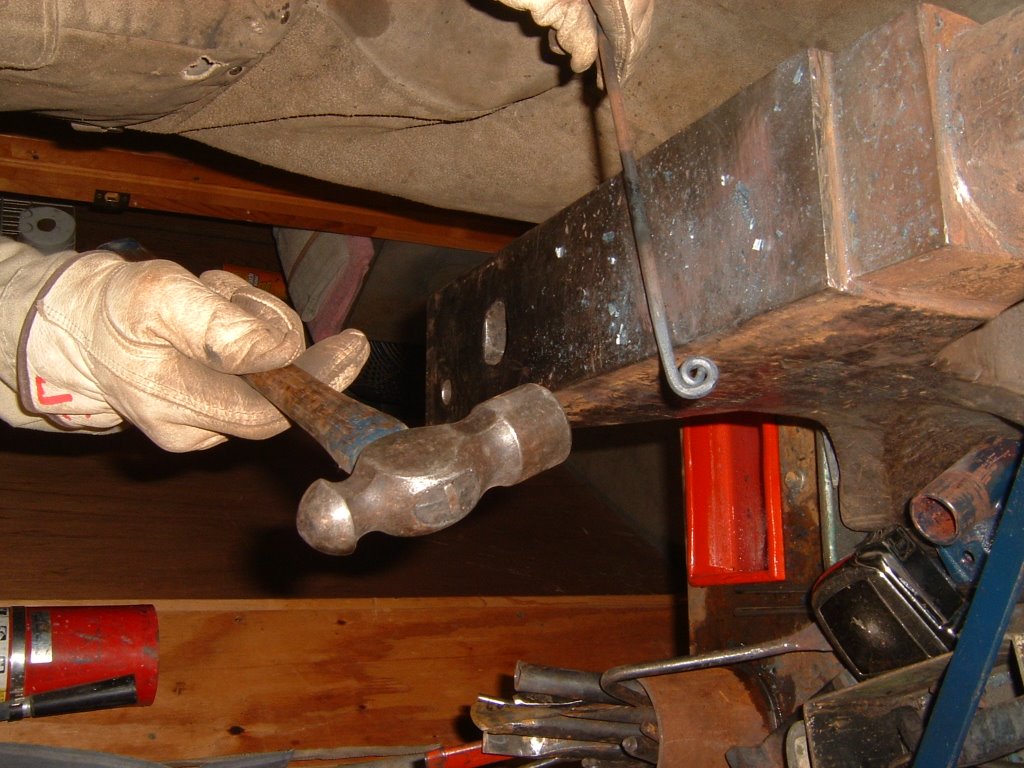
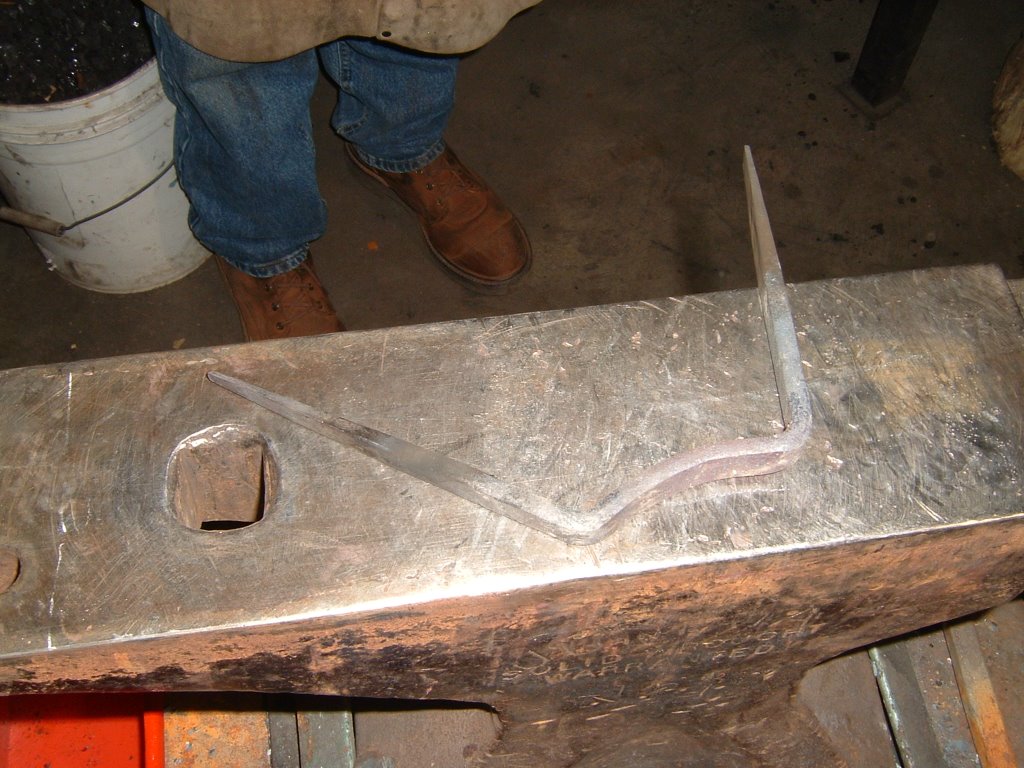
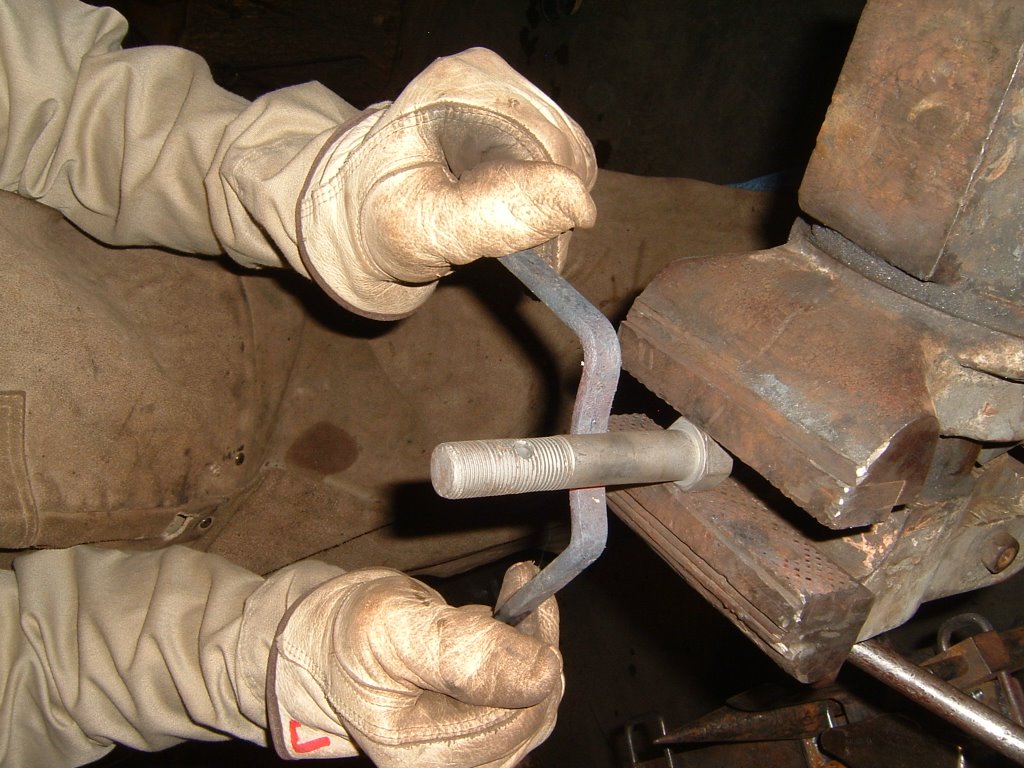
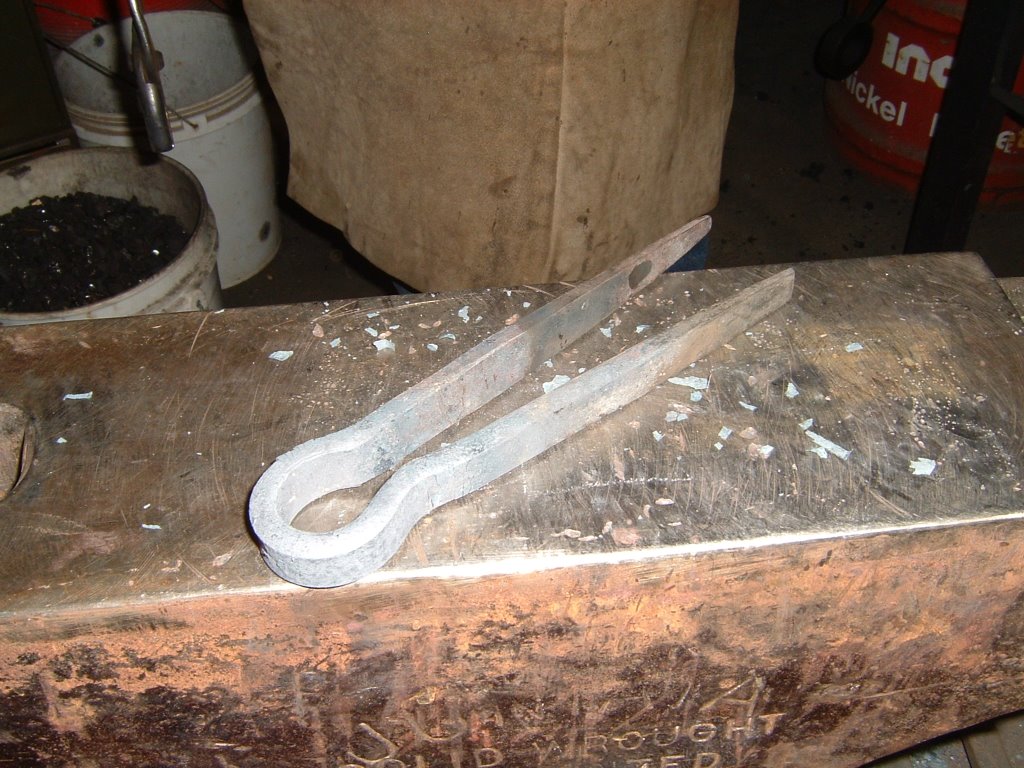
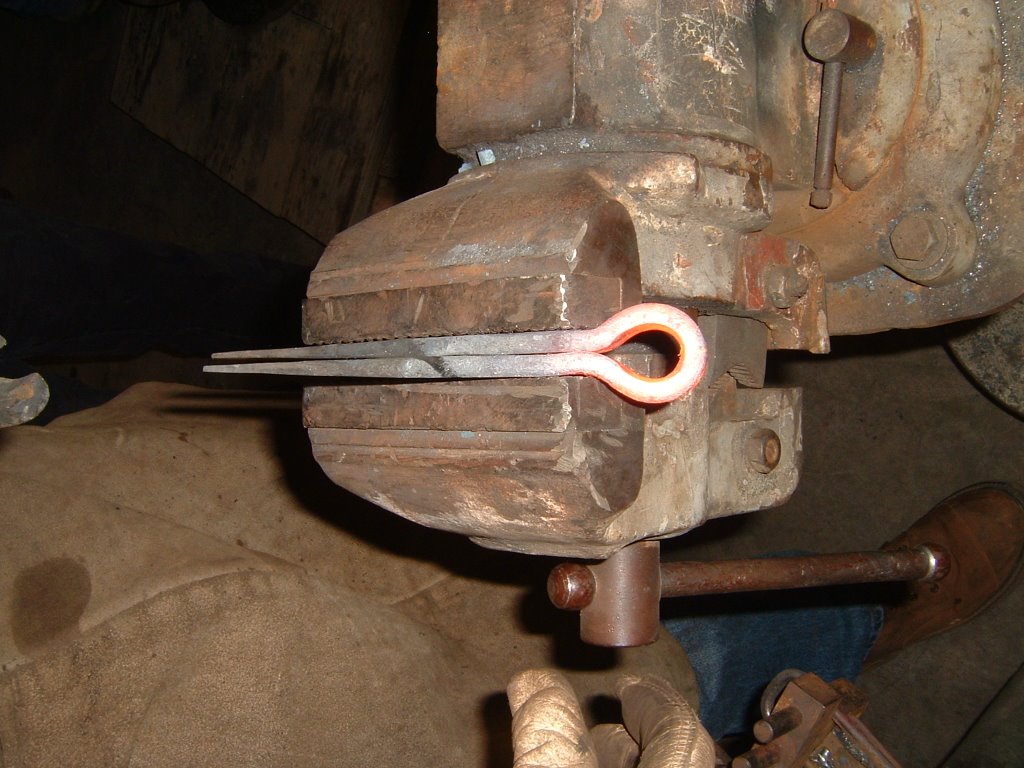
I attended the March 2006 North-East regional meeting of the Saltfork Craftsmen Artist-Blacksmith Association at Dan and Pat Cowart's house. It was a fairly casual affair. Mike Sweeney brought a chunk of exotic metal and forged a rough knife blade using Dan's power hammer. After this, Mike and Mike made a scrolling tool but they were not especially hapy with it. Jim Caruthers made 2 napkin rings and gave them to Pat Cowart. Jim Caruthers then made a bottle opener, and even added a collar with help from Ed Brazeal. Ed made a collaring tool right there on the spot! Jim Caruthers took some time towards the end of the meeting to give a lesson to a college student and I. We made a J hook that you nail into the wall to hang a hat or coat on. Tracy (Dan's son) stood by and helped me through the project.
After it was all over, Dan loaned me a portable hand-crank coal forge! Look for more about that in my next blog.
Here are the pictures:
After it was all over, Dan loaned me a portable hand-crank coal forge! Look for more about that in my next blog.
Here are the pictures:
| Photo | Comment |
 | Mike Sweeney's Anvil + Stand + a Chisel Protection Plate |
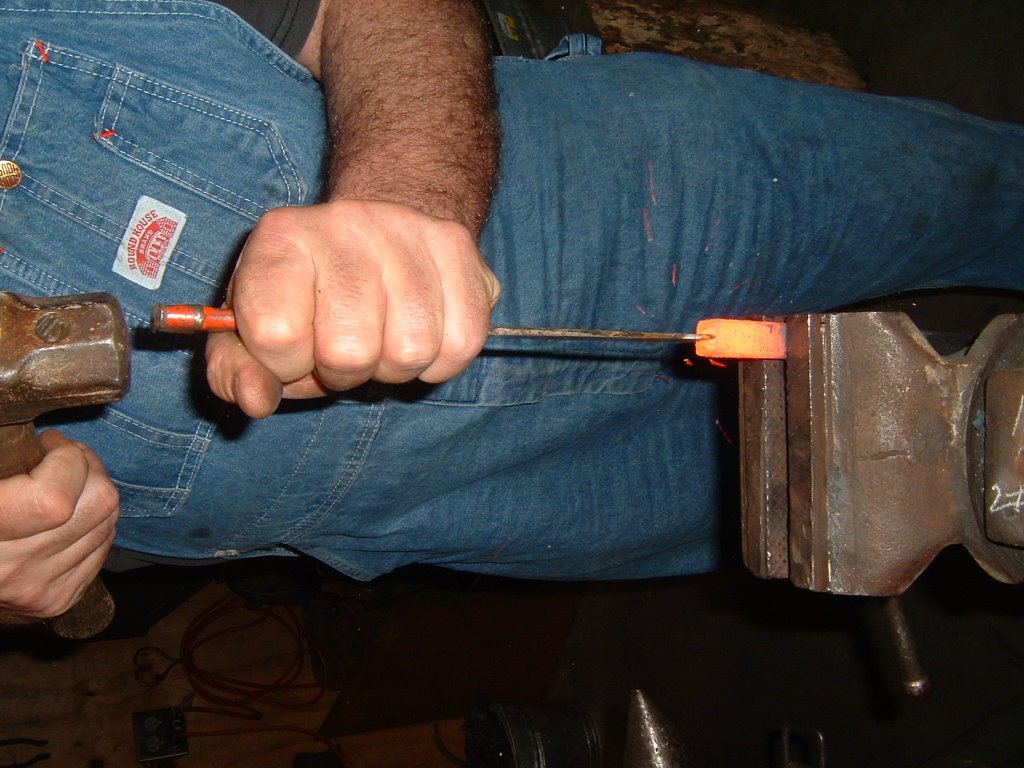
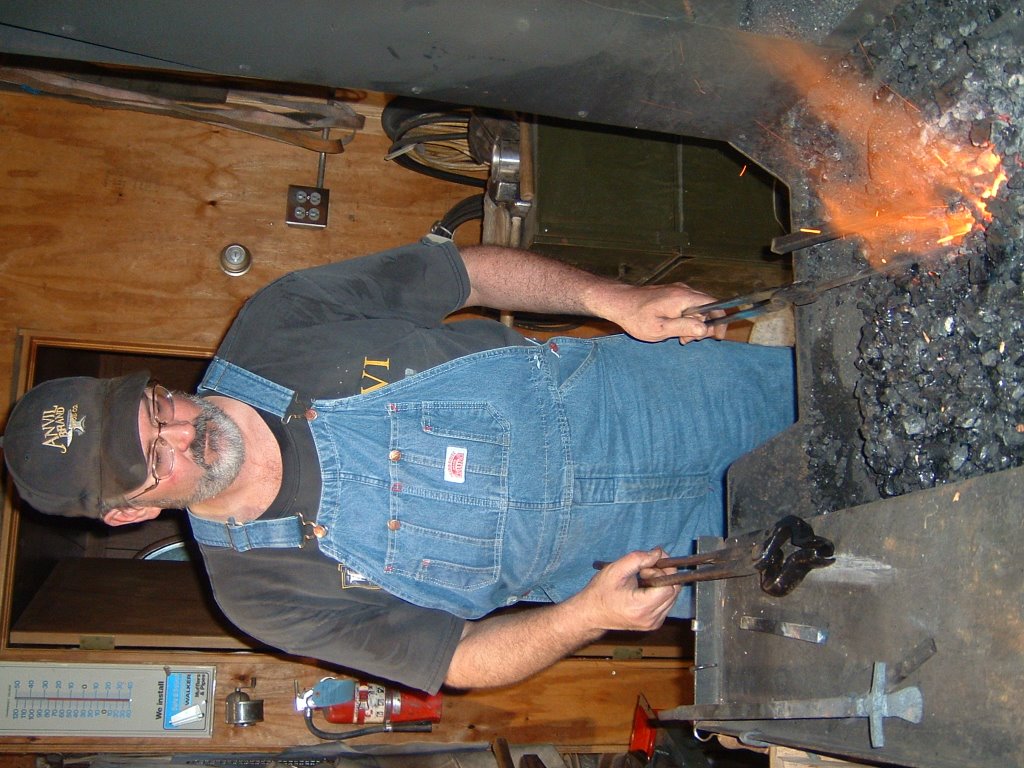
 | Mike Sweeney - heading his knife stock |
 | The gang watching Mike work! - part 1 |
 | The gang watching Mike work! - part 2 |
 | Mike Sweeney drawing down his knife blade |
 | Jim Caruthers ready to bend some napkin rings |
 | Jim C - napkin ring - bending |
 | Jim C - napkin ring - ready for final alignment |
 | Jim C - starting on the second napkin ring |
 | Jim C - starting on the second napkin ring |
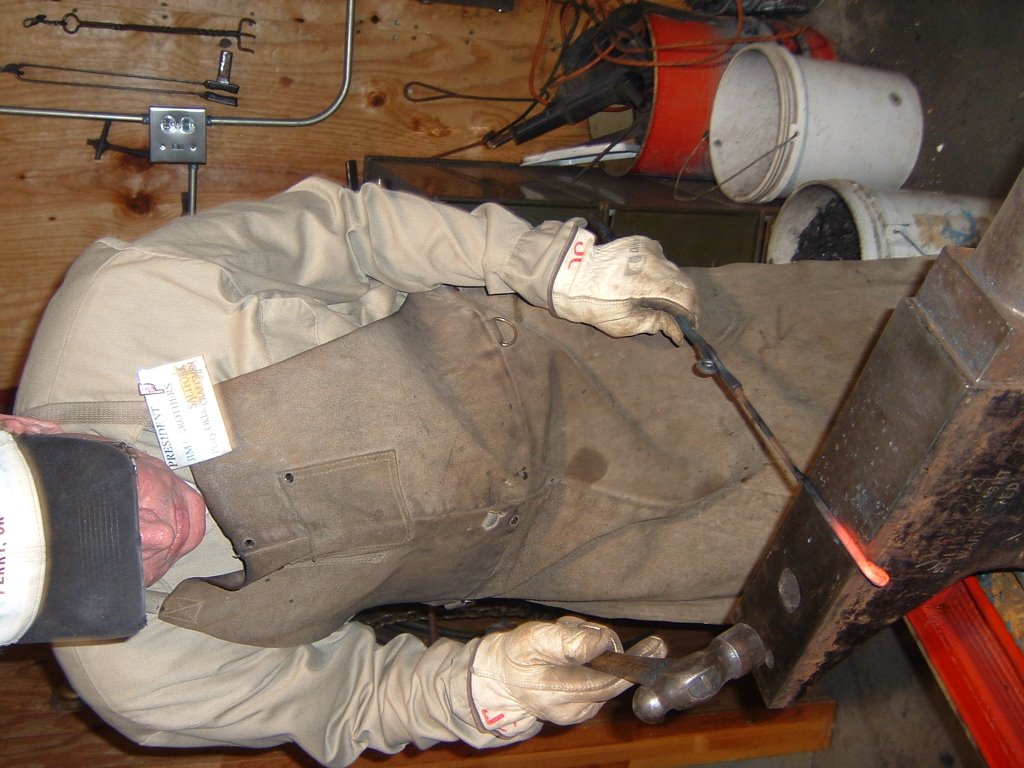
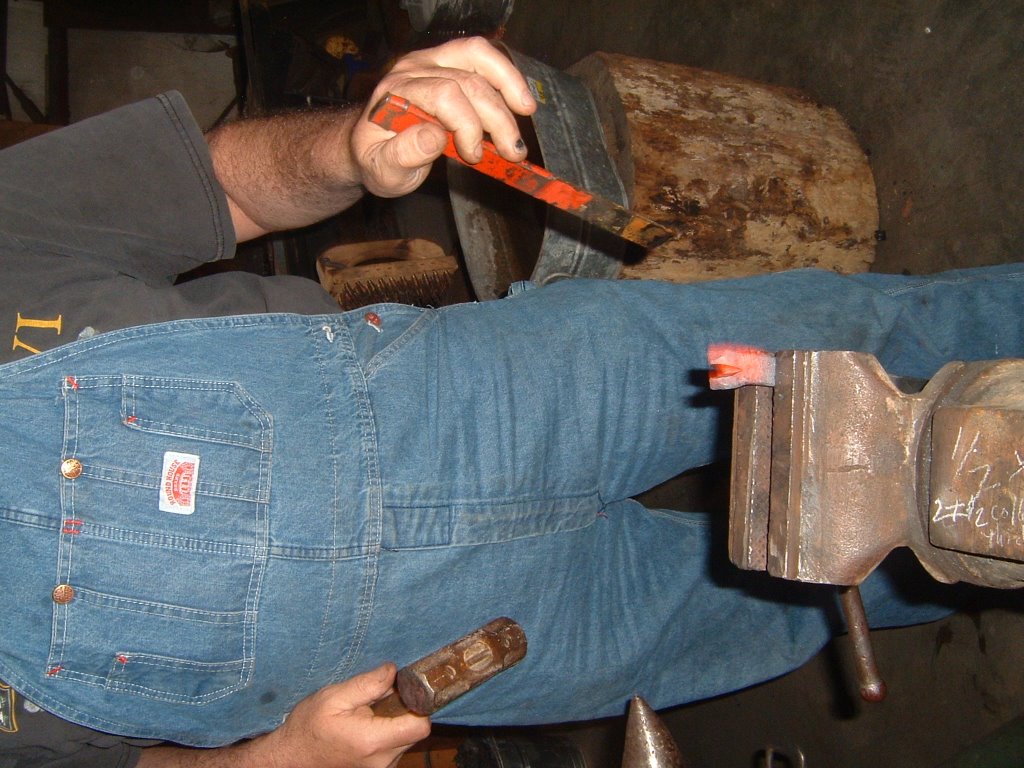
 | Jim C - at the coal forge |
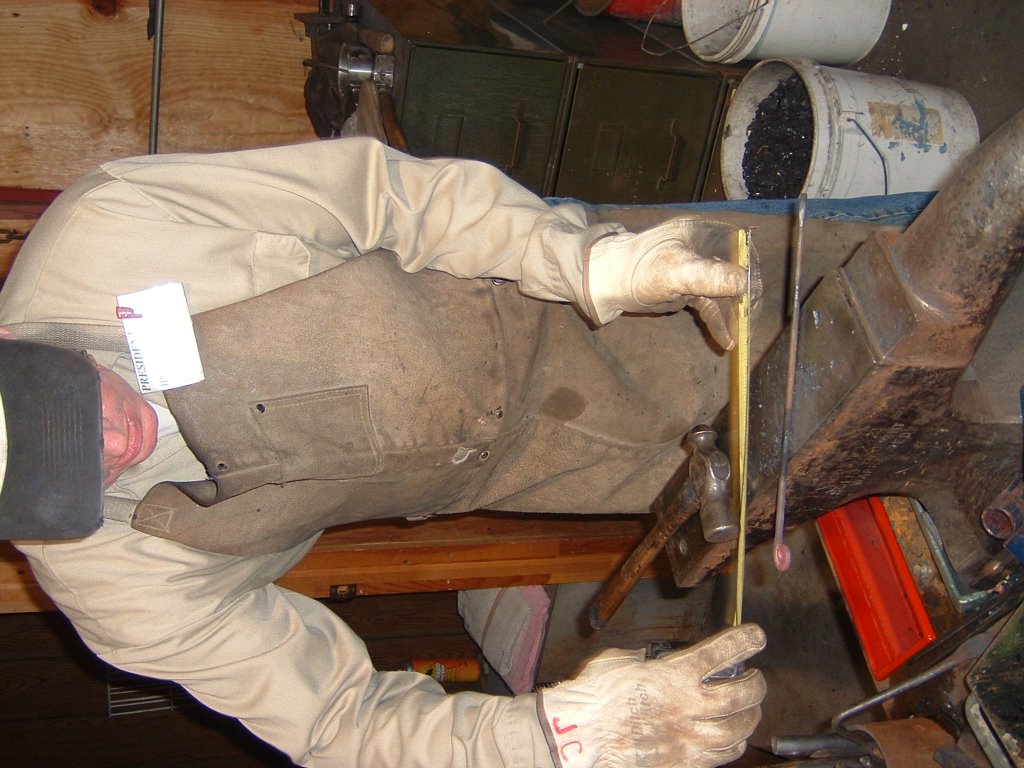 | Jim C - napkin ring - measure twice, bend once |
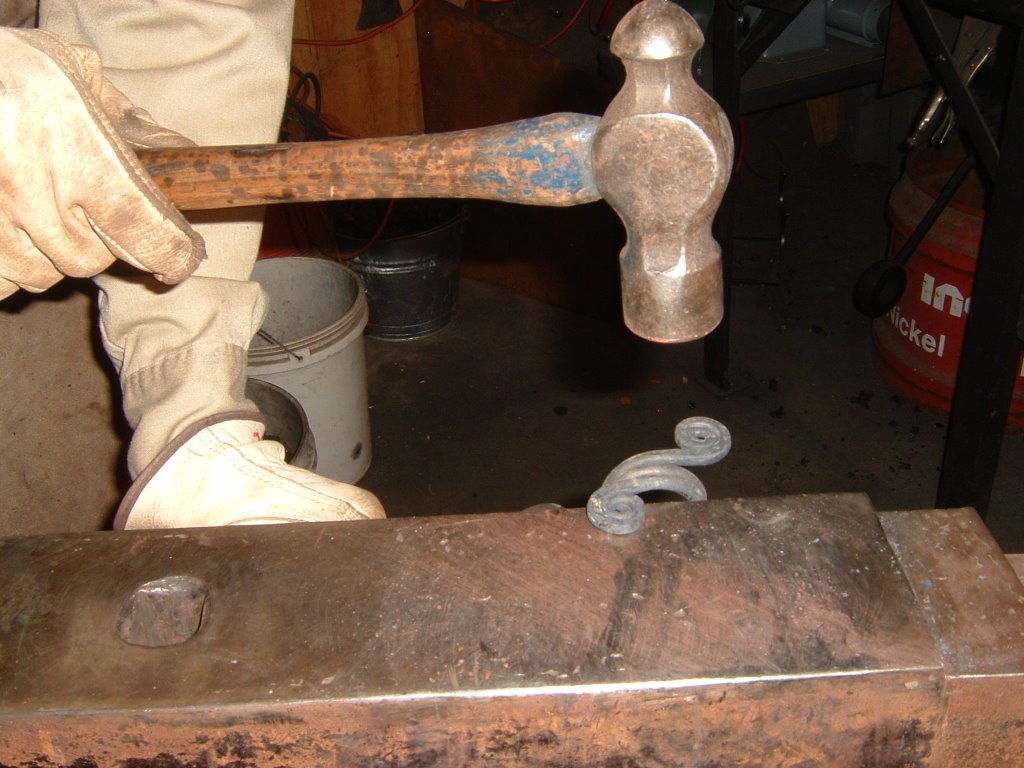
 | Jim C - napkin ring - scrolling |
 | Jim C - napkin ring - scrolling |
 | Jim C - napkin ring - scrolling |
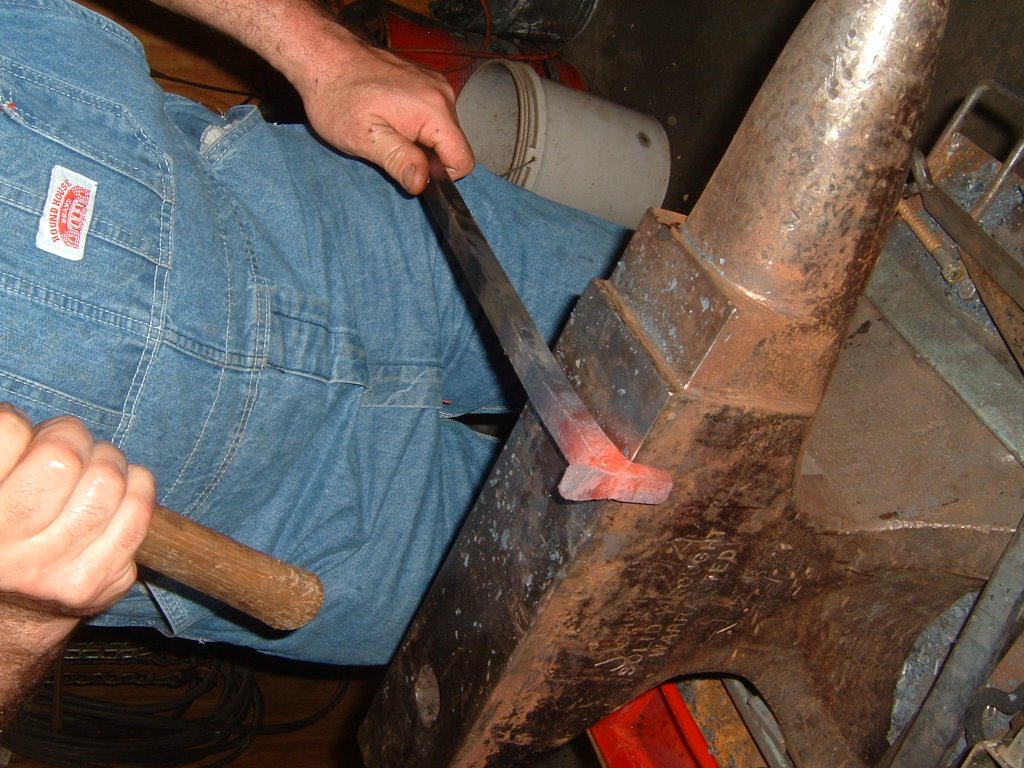
 | Jim C - bending |
 | Jim C - trueing up the decorative scrolls |
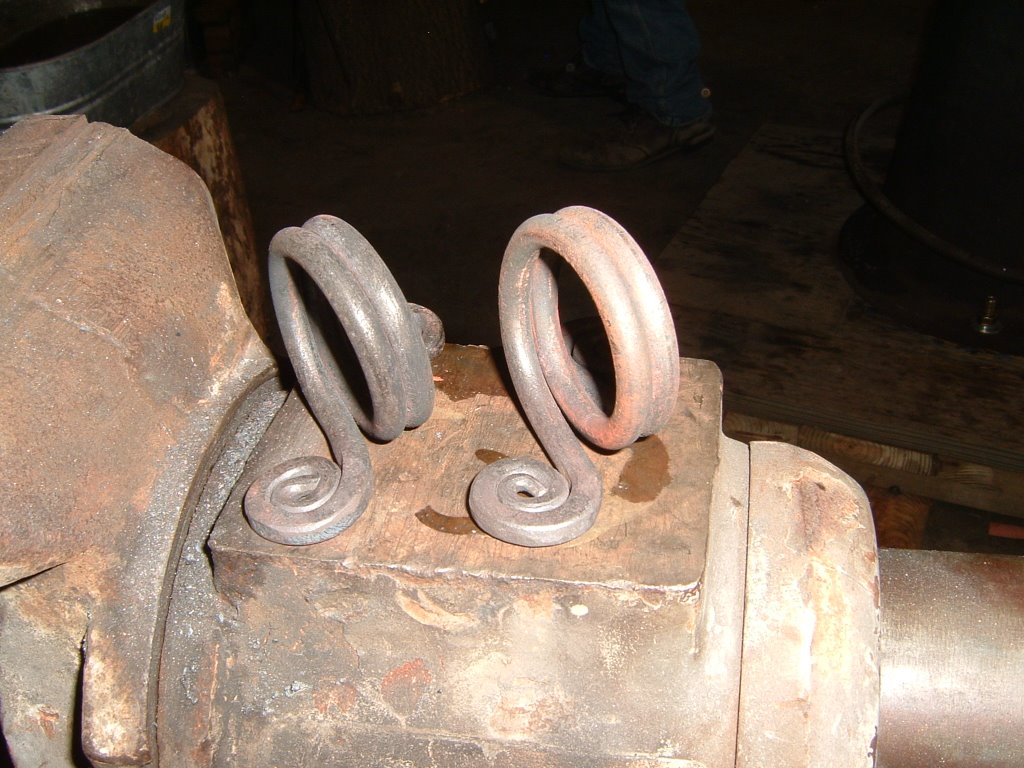 | Jim C - napkin rings finished! |
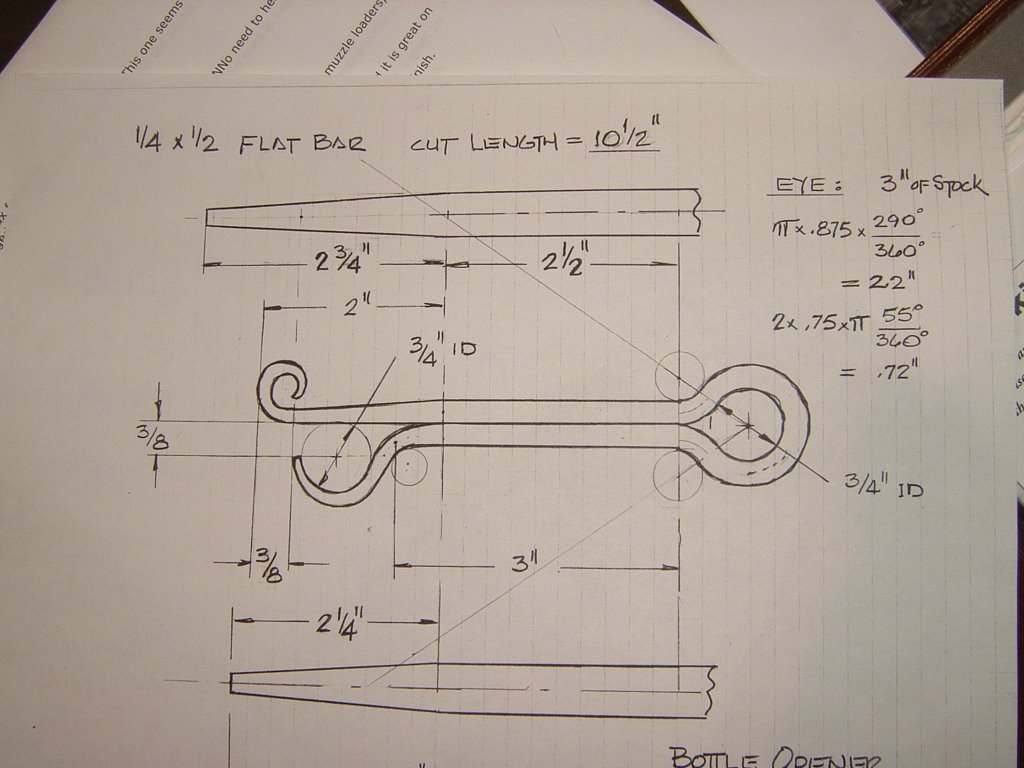 | Jim C - bottle opener - design drawing |
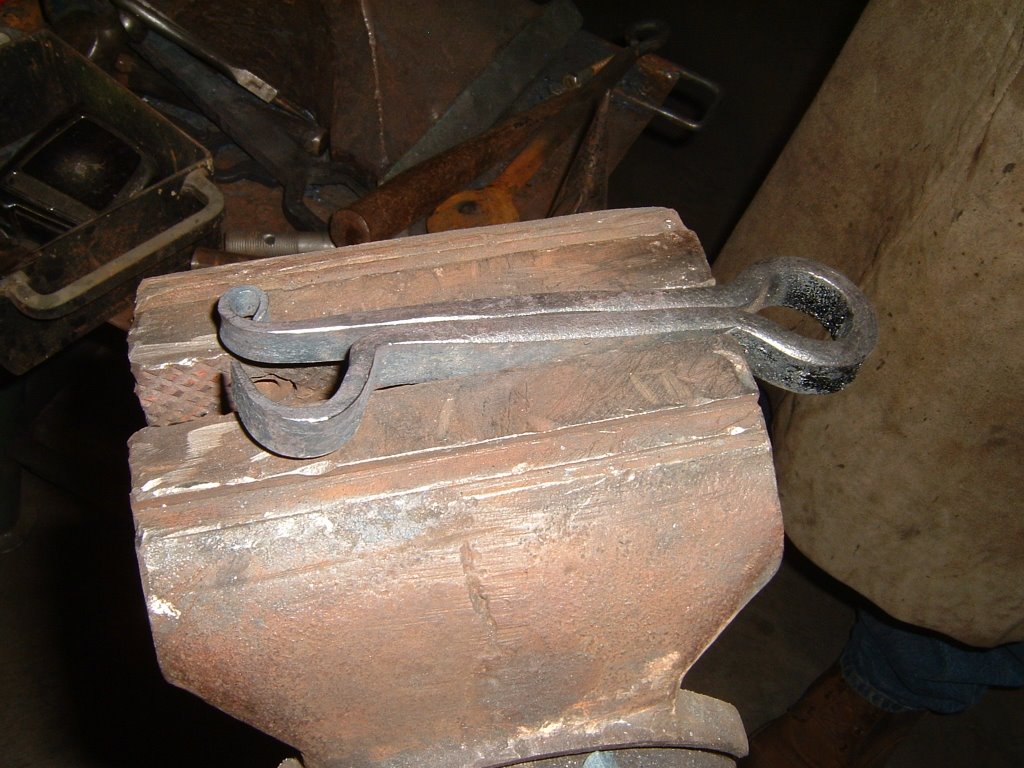
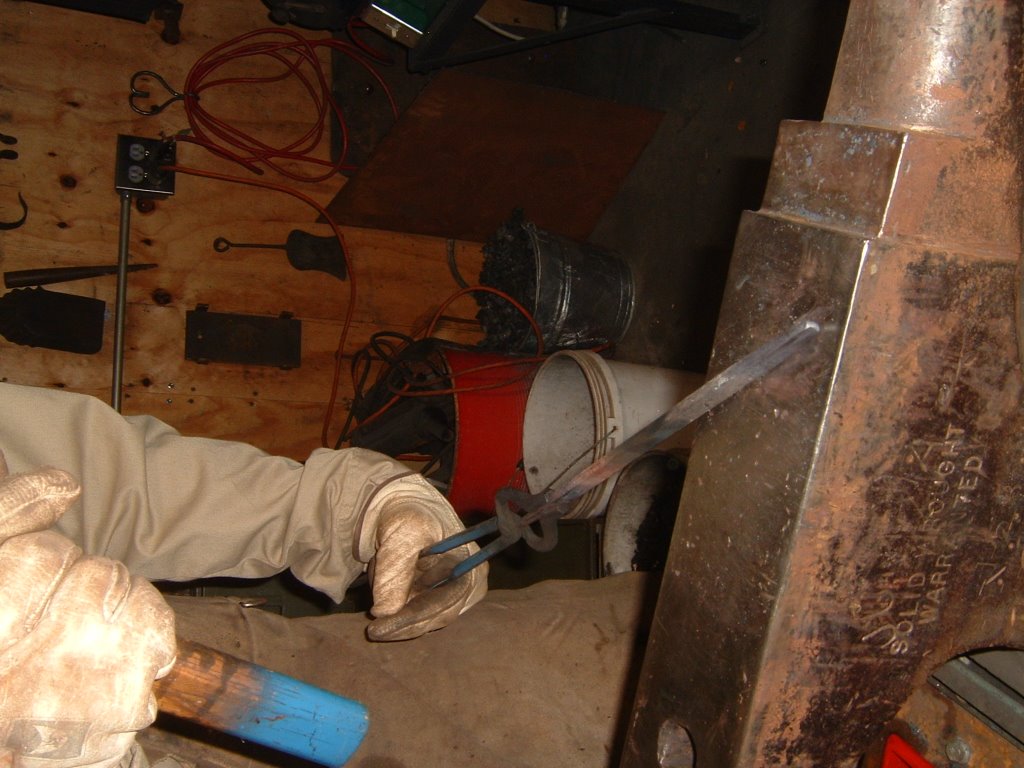 | Jim C - bottle opener |
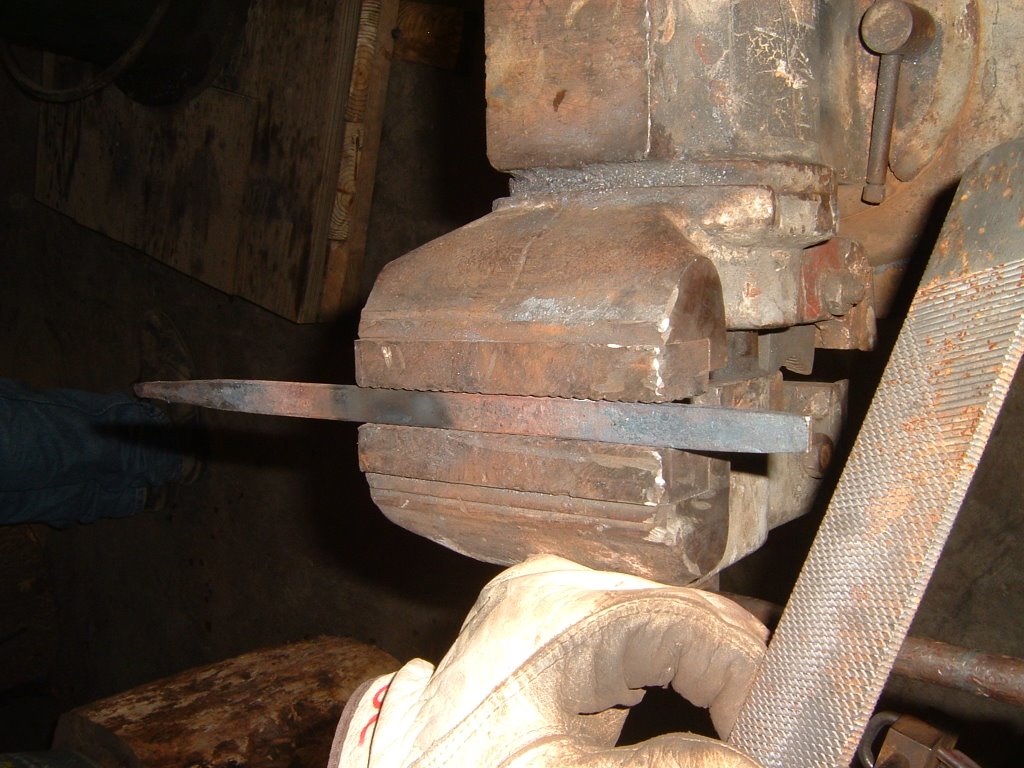 | Jim C - bottle opener |
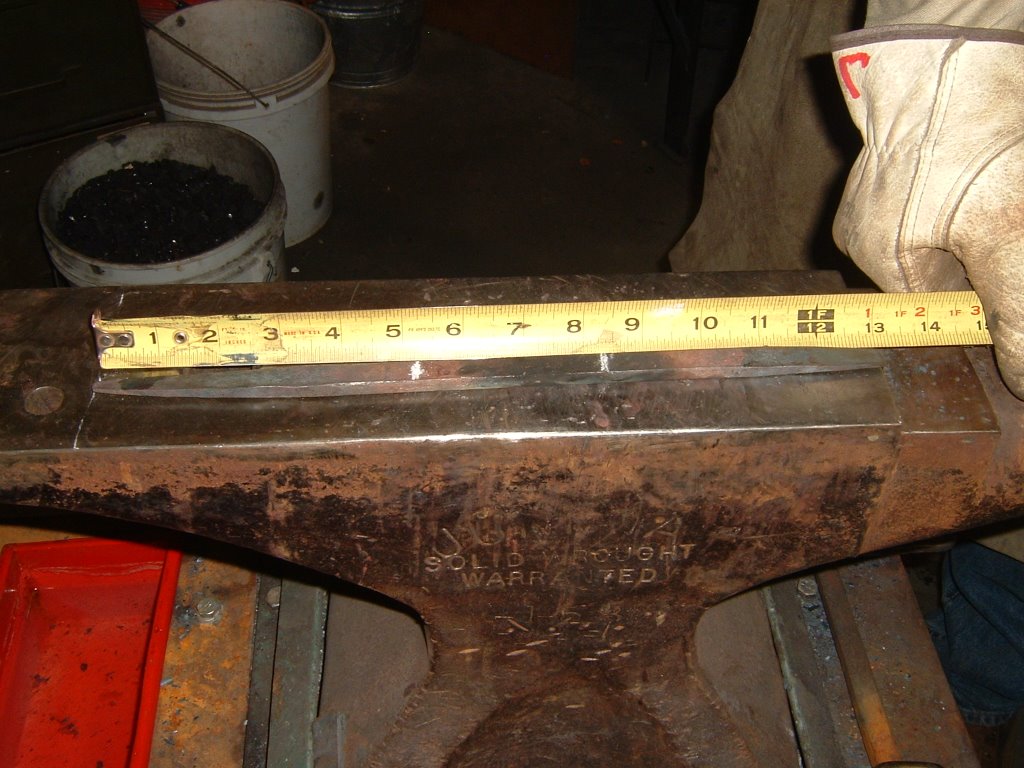 | Jim C - bottle opener |
 | Jim C - bottle opener |
 | Jim C - bottle opener |
 | Jim C - bottle opener |
 | Jim C - bottle opener |
 | Jim C - bottle opener |
 | Jim C - bottle opener |
 | Jim C - bottle opener |
 | Jim C - bottle opener |
 | Jim C - bottle opener |
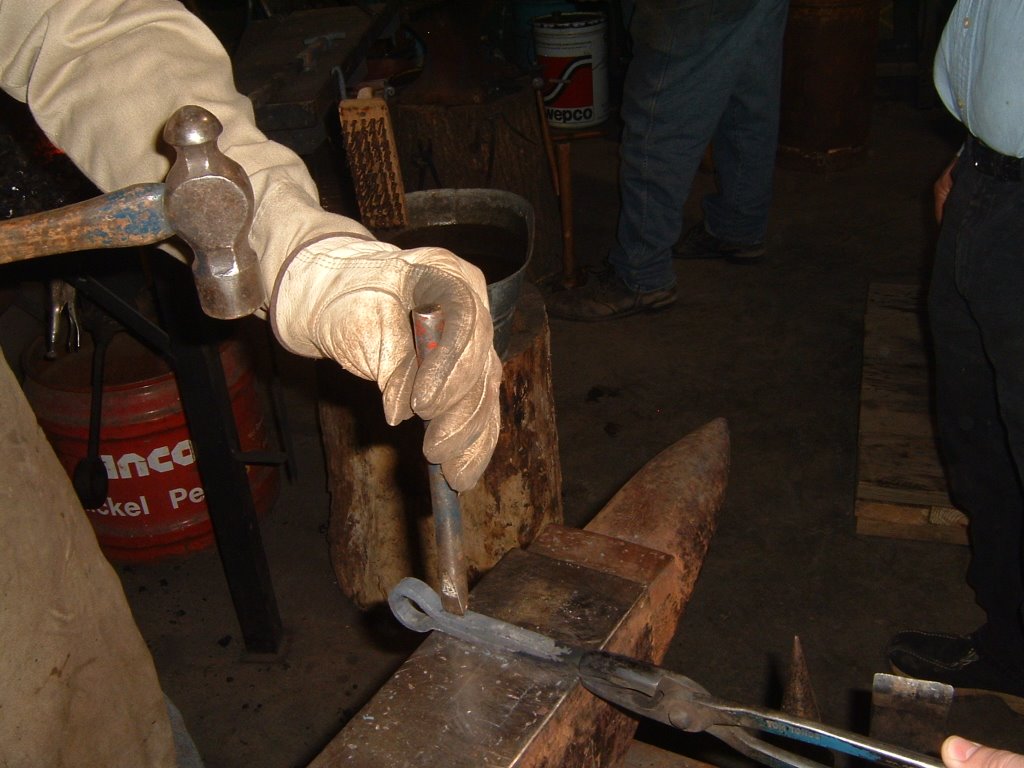 | Jim C - bottle opener - putting his touchmark on |
 | Jim C - bottle opener (before the collar) |
 | Jim C - bottle opener (before the collar) |
 | Jim C - bottle opener (before the collar) |
 | Jim C - bottle opener (before the collar) |
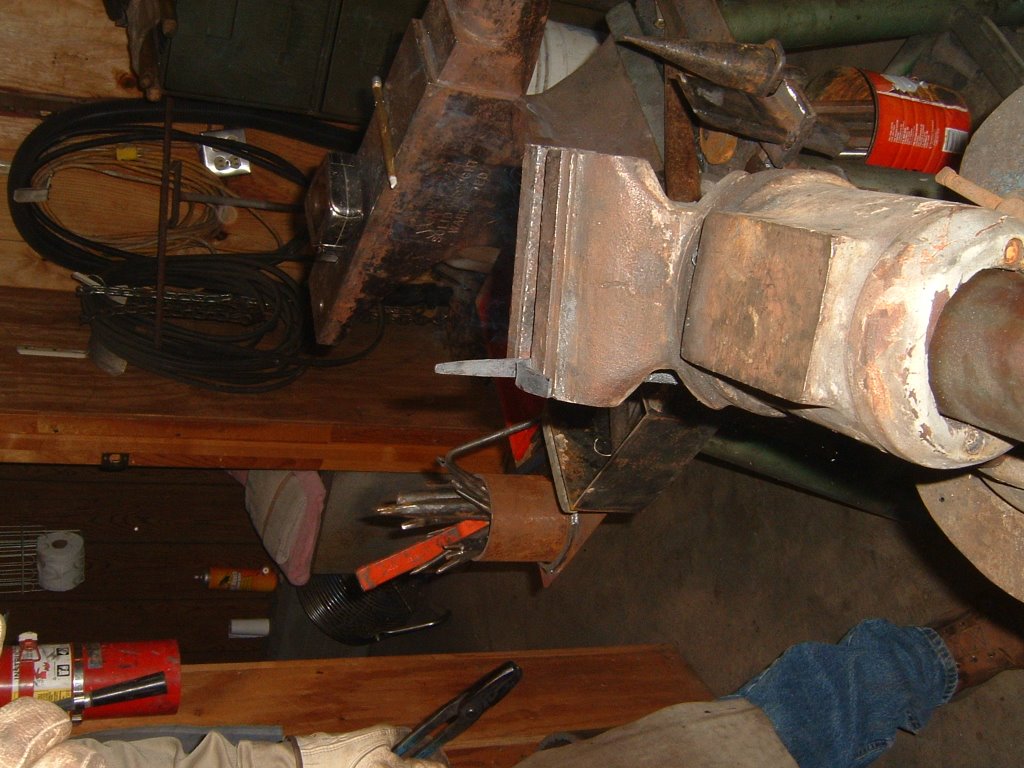
 | Ed Brazeal - making a collaring tool |
 | Ed Brazeal - making a collaring tool |
 | Ed Brazeal - making a collaring tool |
 | Ed Brazeal - making a collaring tool |
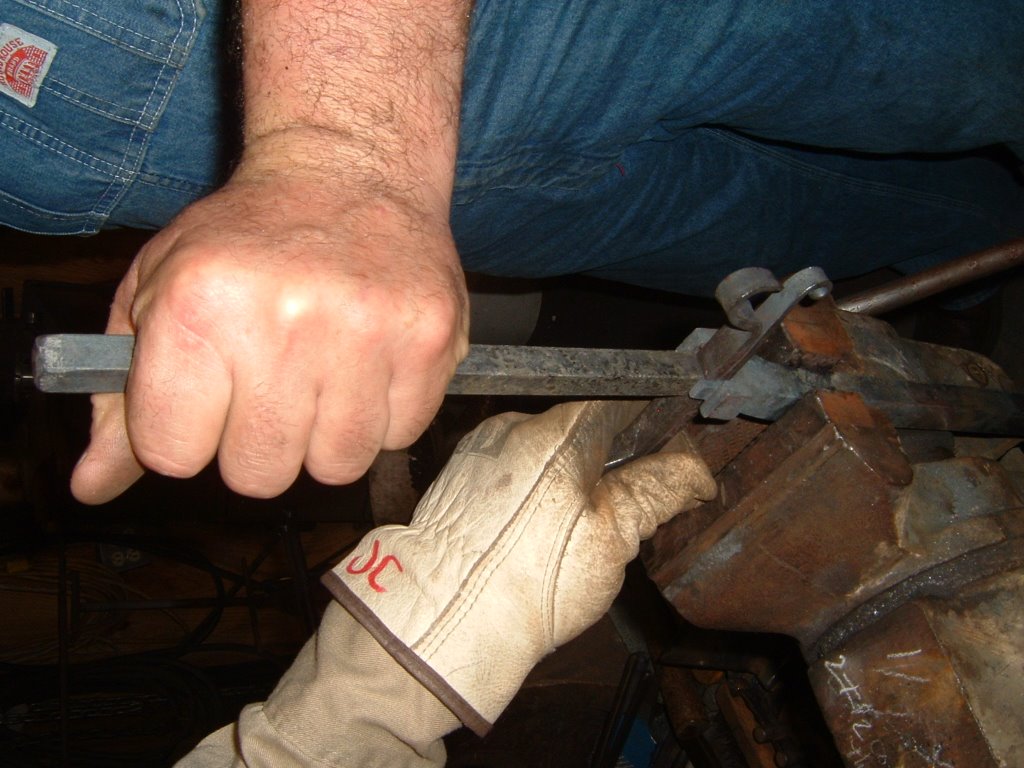
 | Ed Brazeal - collaring test and adjustments |
 | Ed Brazeal - collaring test and adjustments |
 | Ed Brazeal - collaring test and adjustments |
 | Ed Brazeal - collaring test and adjustments |
 | Ed Brazeal - collaring test and adjustments |
 | Jim C and Ed B - bottle opener - adding a collar |
February 01, 2006
Looking for a Forge
I need a forge, be it coal, propane, natural gas - whatever! Since I am trying to get started "on a shoe-string," I will probably have to make a coal forge from the scrap that I am selectively gathering. As a side note, I try very hard not to take home something that I can't use. When I ran across some 3 to 4 foot long 2x4 lumber, I asked around work and gave about 18 sticks away to a friend who was renovating their house. I don't want to be wasteful, but I also don't want to fill my shop with so much stuff that I can't do any work.
Anyone who has read my earlier posts knows that I have been scrounging. That is a good thing, as alot of this stuff would be thrown away, and contributing to the landfills of our consumption-based materialistic society - don't get me started. My brother tipped me off to my latest "find" - a business had closed down, and they were renovating the insides. Actually, they were gutting the shelves and display areas. My brother received permission to take all he wanted: a wire security cage, plywood, 2x4, pressed board shelving, metal shelf arms and wall strips, wall-mounted electrical strips, 2 outlet electrical boxes and laminated shelves. We had to pull the stuff over one weekend, since the wrecking crew were coming monday, and they would be smashing instead of pulling every screw and nail. We probably pulled 40+ 2x4s, 120+ shelf brackets, 6 electrical strips, 12+ electrical boxes and a few pressed board shelves. That is cool and all, but none of this really contributed to my immediate forging goals.
I found some square tubing and angle iron (in the form of a shed door) in the brush behind my house (I haven't had time to clean up my land yet.) I'm thinking about cutting it up to make legs for a coal forge, or maybe a work bench.
I will probably not build a concrete block and brick forge - just too bulky. I might make a brake drum forge, or just use the plans from "Forge & Anvil" - a wheelbarrow pan with fire brick, fire clay and a wooden frame. I have some 2x4 wood scraps that would work fine, but no fire brick or fire clay. Lowes has a tiny plastic container of fireplace repair mortar - maybe 8 ounces. Any kind of coal forge will need a firepot, a tuyere, and a blower. The blower might end up costing me a few dollars if I have to buy it off of ebay. I am hoping to use some pipe and a home-made grate to make a poor-man's tuyere. I would love to find some 10 to 12 inch stove pipe so I could position the forge inside my shop, rather than at the door.
In other news, I have been looking for charcoal making instructions on the web. I'll share my findings with you in a future entry.
IForgeIron.com had a tip: Flexible metal dryer vent can be used for the air supply connection to the forge. We'll see.
A fellow member of SCABA is going to loan me a coal forge for a few months! Now all I have to do is go visit him.
Update: A mechanic friend mentioned that I should be VERY careful with brake drums, since brake pads may have asbestos in them, and the asbestos embeds itself into the drum. Let's hope you find a drum with Kevlar pads. I don't have specific safety recommendations for you, but use a tight-sealing air mask when handling and cleaning your brake drum!
January 19, 2006
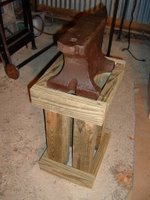
A wooden anvil stand
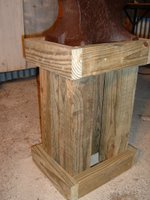
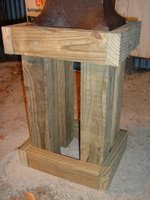
I need a stand for my anvil. I spotted a simple stand at the January 2006 Saltfork Craftsmen's meeting that I think I could build.
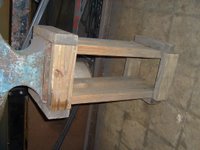
I modified the design to fit the miscellaneous lumber that I have available. I used:
Since I used 4x4 supports, I haven't added any metal strapping or cross-bracing to this. I am not sure if I want to use the same stand for both anvil and swage block, or to make another one to support my swage block. The anvil base measures 9.25 x 11 inches, and the swage block measures 12 x 7.5 x 3.5 inches. Since I have limited floor space, I might end up using the swage block in the same stand. For that purpose, I made the stand hold a 12 x 9.5 inch tool. If you want to make one, measure from the floor to your knuckles, add 2 inches to avoid hyper-extension of your elbow joint, and subtract the height of your anvil. This is the height of your uprights (22 inches in my case). You can make the sides about 1/2 inch longer than the length of your anvil/swage base. For the ends you should add 1/2 inch for slop and 3 1/4 inches to overlap the two "side" 2x4s.
Regarding the anvil, I have worked the top and sides with a wire-brush to remove some of the rust and paint. I haven't taken a grinder to it yet, as I'm not sure if that is wise. I can take metal off quickly, but putting it back on would be very difficult.
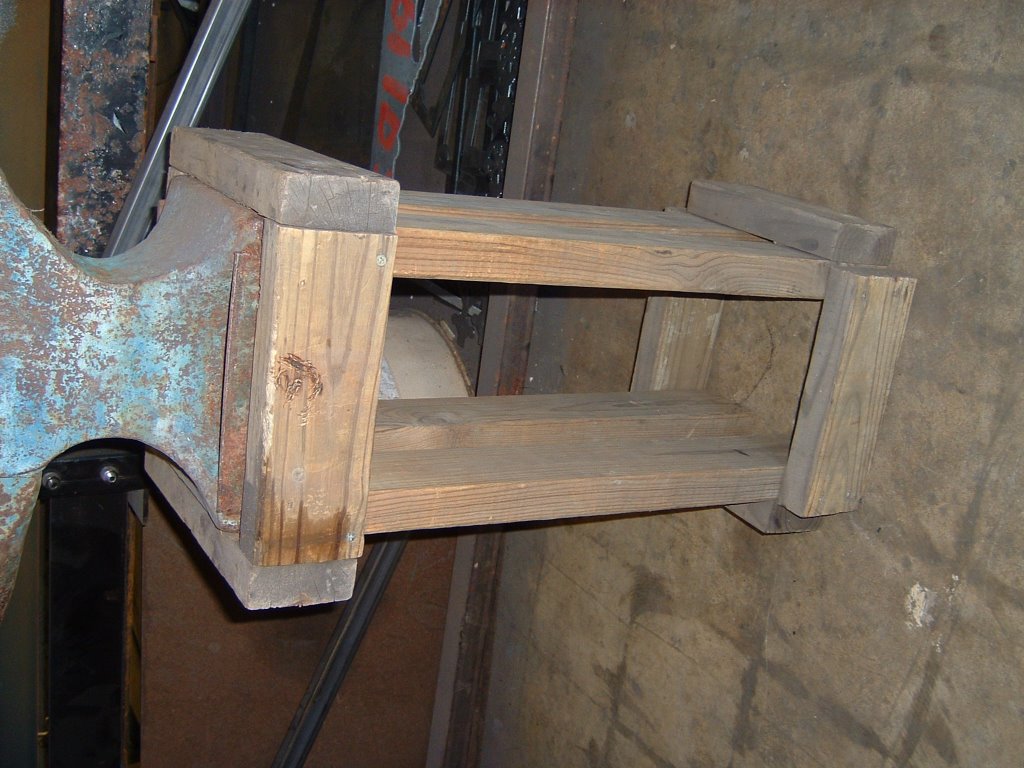
I modified the design to fit the miscellaneous lumber that I have available. I used:
- four 2x4 boards 12 1/2 inches for sides (these boards are flush with the uprights)
- four 2x4 boards 12 3/8 inches for ends (these boards overlap the ends of the other 2x4s)
- four 4x4 boards 22 inches for uprights
- 3 1/2 inch screws
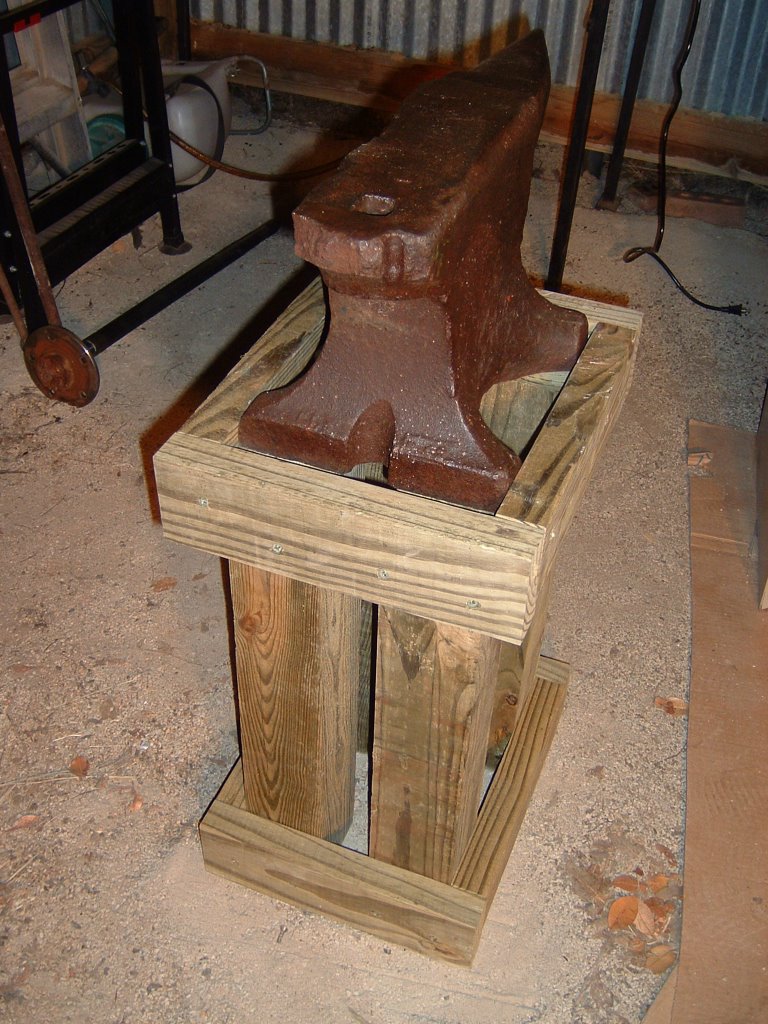
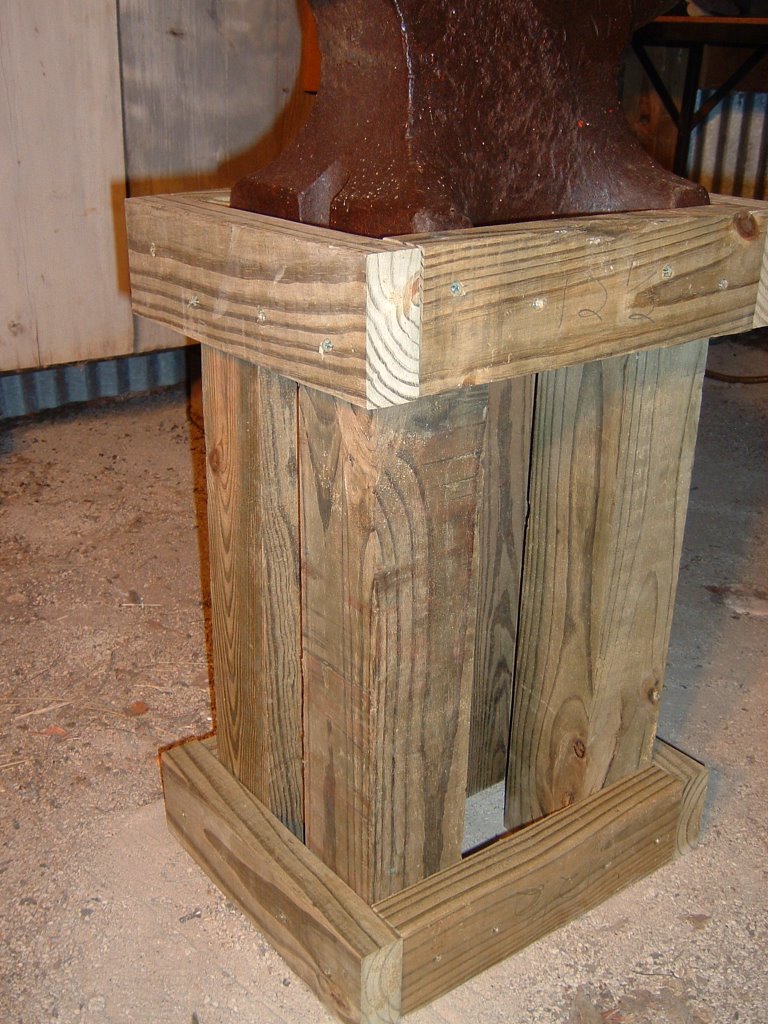
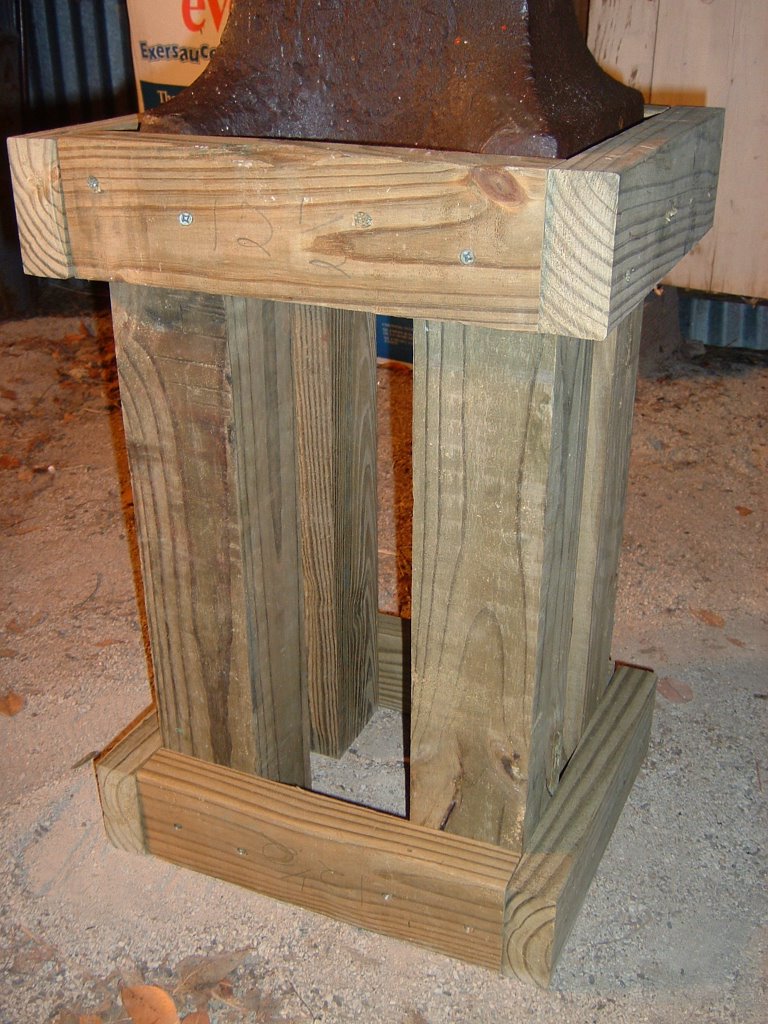
Since I used 4x4 supports, I haven't added any metal strapping or cross-bracing to this. I am not sure if I want to use the same stand for both anvil and swage block, or to make another one to support my swage block. The anvil base measures 9.25 x 11 inches, and the swage block measures 12 x 7.5 x 3.5 inches. Since I have limited floor space, I might end up using the swage block in the same stand. For that purpose, I made the stand hold a 12 x 9.5 inch tool. If you want to make one, measure from the floor to your knuckles, add 2 inches to avoid hyper-extension of your elbow joint, and subtract the height of your anvil. This is the height of your uprights (22 inches in my case). You can make the sides about 1/2 inch longer than the length of your anvil/swage base. For the ends you should add 1/2 inch for slop and 3 1/4 inches to overlap the two "side" 2x4s.
Regarding the anvil, I have worked the top and sides with a wire-brush to remove some of the rust and paint. I haven't taken a grinder to it yet, as I'm not sure if that is wise. I can take metal off quickly, but putting it back on would be very difficult.
Subscribe to:
Posts (Atom)