I need a forge, be it coal, propane, natural gas - whatever! Since I am trying to get started "on a shoe-string," I will probably have to make a coal forge from the scrap that I am selectively gathering. As a side note, I try very hard not to take home something that I can't use. When I ran across some 3 to 4 foot long 2x4 lumber, I asked around work and gave about 18 sticks away to a friend who was renovating their house. I don't want to be wasteful, but I also don't want to fill my shop with so much stuff that I can't do any work.
Anyone who has read my earlier posts knows that I have been scrounging. That is a good thing, as alot of this stuff would be thrown away, and contributing to the landfills of our consumption-based materialistic society - don't get me started. My brother tipped me off to my latest "find" - a business had closed down, and they were renovating the insides. Actually, they were gutting the shelves and display areas. My brother received permission to take all he wanted: a wire security cage, plywood, 2x4, pressed board shelving, metal shelf arms and wall strips, wall-mounted electrical strips, 2 outlet electrical boxes and laminated shelves. We had to pull the stuff over one weekend, since the wrecking crew were coming monday, and they would be smashing instead of pulling every screw and nail. We probably pulled 40+ 2x4s, 120+ shelf brackets, 6 electrical strips, 12+ electrical boxes and a few pressed board shelves. That is cool and all, but none of this really contributed to my immediate forging goals.
I found some square tubing and angle iron (in the form of a shed door) in the brush behind my house (I haven't had time to clean up my land yet.) I'm thinking about cutting it up to make legs for a coal forge, or maybe a work bench.
I will probably not build a concrete block and brick forge - just too bulky. I might make a brake drum forge, or just use the plans from "Forge & Anvil" - a wheelbarrow pan with fire brick, fire clay and a wooden frame. I have some 2x4 wood scraps that would work fine, but no fire brick or fire clay. Lowes has a tiny plastic container of fireplace repair mortar - maybe 8 ounces. Any kind of coal forge will need a firepot, a tuyere, and a blower. The blower might end up costing me a few dollars if I have to buy it off of ebay. I am hoping to use some pipe and a home-made grate to make a poor-man's tuyere. I would love to find some 10 to 12 inch stove pipe so I could position the forge inside my shop, rather than at the door.
In other news, I have been looking for charcoal making instructions on the web. I'll share my findings with you in a future entry.
IForgeIron.com had a tip: Flexible metal dryer vent can be used for the air supply connection to the forge. We'll see.
A fellow member of SCABA is going to loan me a coal forge for a few months! Now all I have to do is go visit him.
Update: A mechanic friend mentioned that I should be VERY careful with brake drums, since brake pads may have asbestos in them, and the asbestos embeds itself into the drum. Let's hope you find a drum with Kevlar pads. I don't have specific safety recommendations for you, but use a tight-sealing air mask when handling and cleaning your brake drum!
February 01, 2006


January 19, 2006
A wooden anvil stand
I need a stand for my anvil. I spotted a simple stand at the January 2006 Saltfork Craftsmen's meeting that I think I could build.
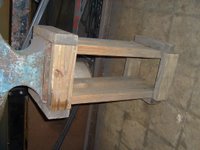
I modified the design to fit the miscellaneous lumber that I have available. I used:
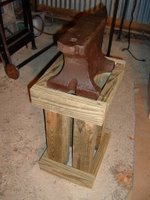
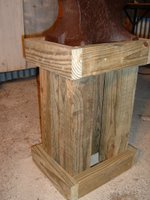
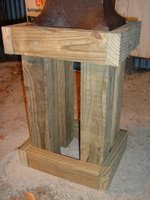
Since I used 4x4 supports, I haven't added any metal strapping or cross-bracing to this. I am not sure if I want to use the same stand for both anvil and swage block, or to make another one to support my swage block. The anvil base measures 9.25 x 11 inches, and the swage block measures 12 x 7.5 x 3.5 inches. Since I have limited floor space, I might end up using the swage block in the same stand. For that purpose, I made the stand hold a 12 x 9.5 inch tool. If you want to make one, measure from the floor to your knuckles, add 2 inches to avoid hyper-extension of your elbow joint, and subtract the height of your anvil. This is the height of your uprights (22 inches in my case). You can make the sides about 1/2 inch longer than the length of your anvil/swage base. For the ends you should add 1/2 inch for slop and 3 1/4 inches to overlap the two "side" 2x4s.
Regarding the anvil, I have worked the top and sides with a wire-brush to remove some of the rust and paint. I haven't taken a grinder to it yet, as I'm not sure if that is wise. I can take metal off quickly, but putting it back on would be very difficult.
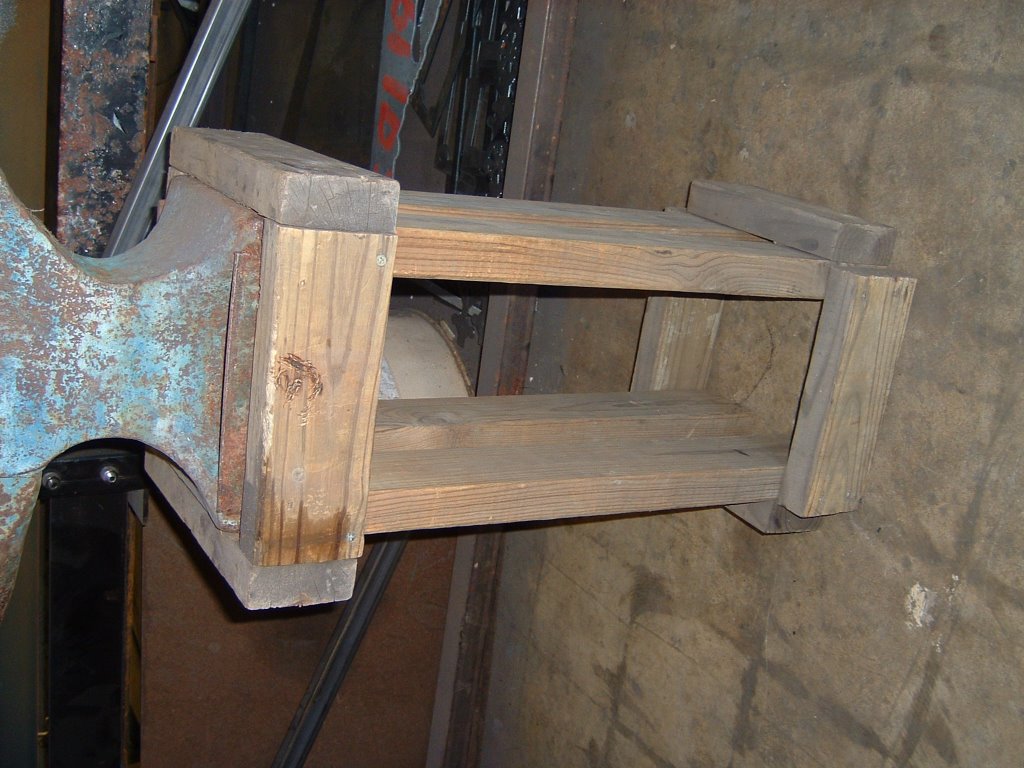
I modified the design to fit the miscellaneous lumber that I have available. I used:
- four 2x4 boards 12 1/2 inches for sides (these boards are flush with the uprights)
- four 2x4 boards 12 3/8 inches for ends (these boards overlap the ends of the other 2x4s)
- four 4x4 boards 22 inches for uprights
- 3 1/2 inch screws
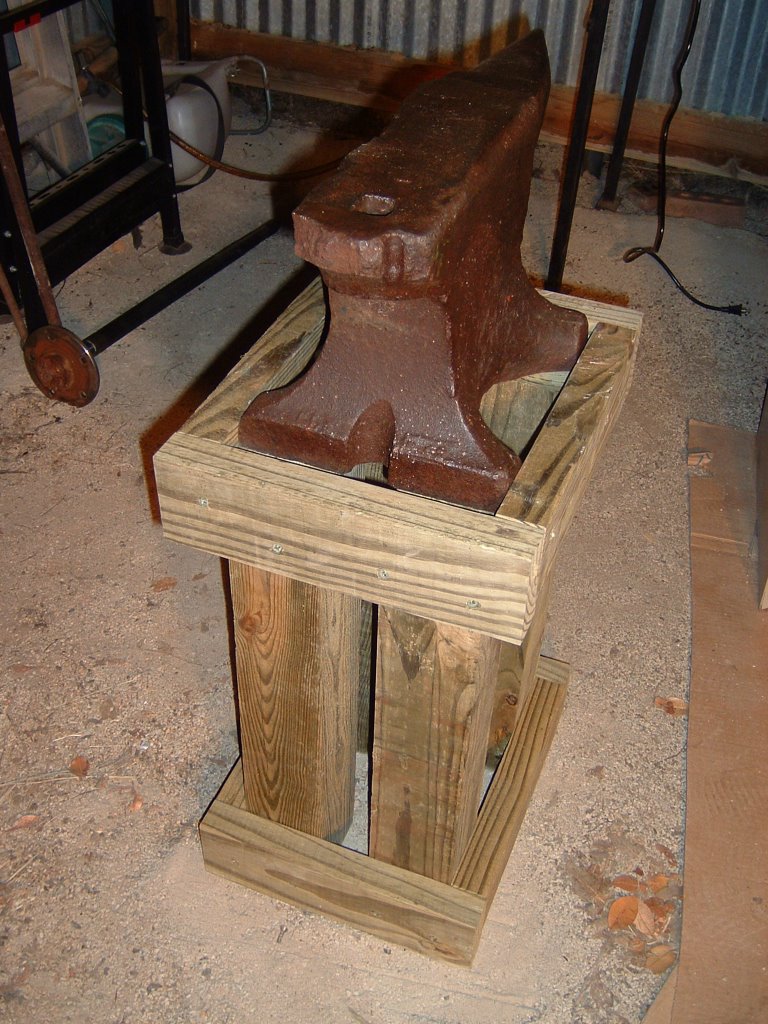
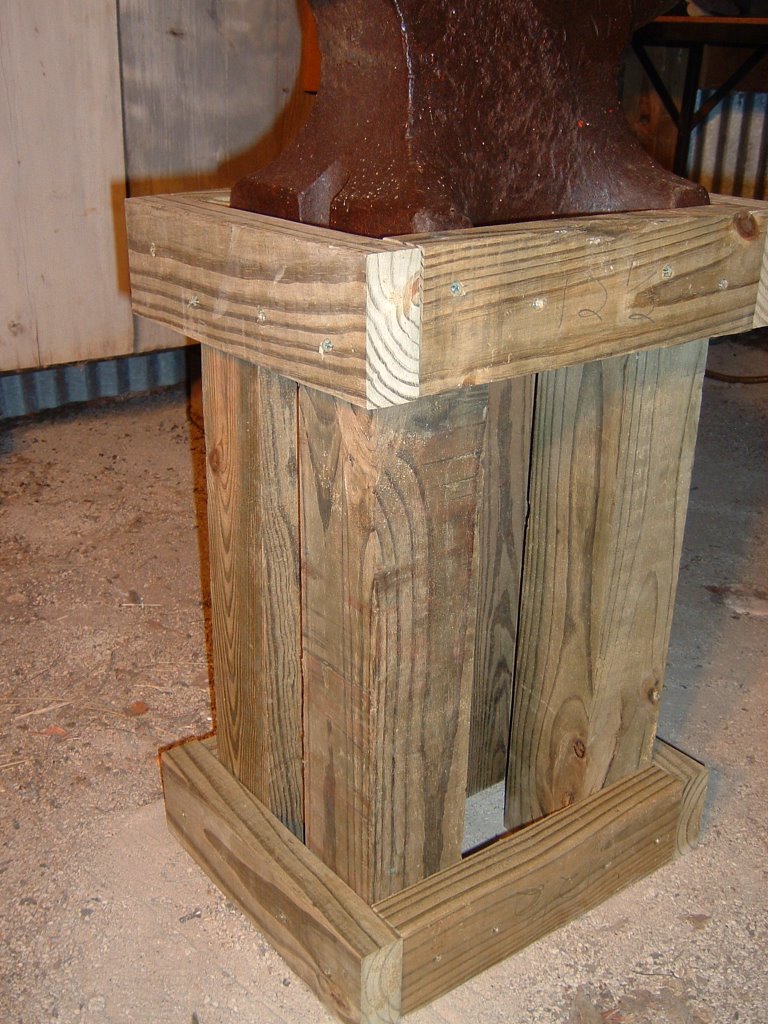
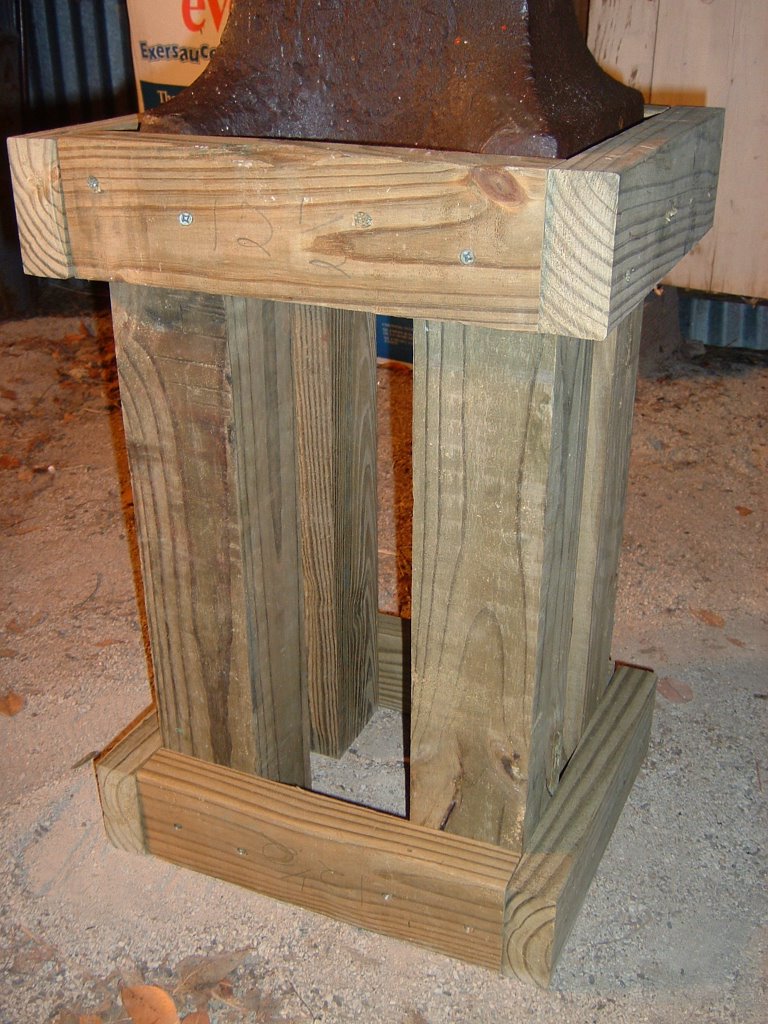
Since I used 4x4 supports, I haven't added any metal strapping or cross-bracing to this. I am not sure if I want to use the same stand for both anvil and swage block, or to make another one to support my swage block. The anvil base measures 9.25 x 11 inches, and the swage block measures 12 x 7.5 x 3.5 inches. Since I have limited floor space, I might end up using the swage block in the same stand. For that purpose, I made the stand hold a 12 x 9.5 inch tool. If you want to make one, measure from the floor to your knuckles, add 2 inches to avoid hyper-extension of your elbow joint, and subtract the height of your anvil. This is the height of your uprights (22 inches in my case). You can make the sides about 1/2 inch longer than the length of your anvil/swage base. For the ends you should add 1/2 inch for slop and 3 1/4 inches to overlap the two "side" 2x4s.
Regarding the anvil, I have worked the top and sides with a wire-brush to remove some of the rust and paint. I haven't taken a grinder to it yet, as I'm not sure if that is wise. I can take metal off quickly, but putting it back on would be very difficult.
January 16, 2006
January 2006 Meeting of Saltfork Craftsmen
I attended the January meeting of the Saltfork Craftsmen Artist-Blacksmiths Association. The North-East Regional meeting was held in Tulsa, OK at the T-Town Metal Men's shop. Many thanks to Bill and Jeff for hosting this meeting.
If you live in the Northeastern Oklahoma area, you should come to the next meeting.
I wasn't sure what to expect, but I had fun at the meeting. The meeting was to be from 8 AM to 3 PM, but we were slow getting around, and my wife and I went to IHOP first, so I didn't get there until 10:30 AM. The guys were nice, and I was finally able to watch several accomplished blacksmiths at work. As you might expect, the projects were smaller, since each one was supposed to be finished that day. I learned a few things, although all of the lessons were beyond my skill. I wasn't the only beginner there - I introduced myself to at least 2 others that were first-time attenders. I joined up and purchased a swage block, even though I don't have a forge yet.
Lessons:
Here are some pictures and comments. The images were taken on a Fuji A302, and are numbered exactly as I took them. If you want a hi-res image, just click on the photo.
If you live in the Northeastern Oklahoma area, you should come to the next meeting.
I wasn't sure what to expect, but I had fun at the meeting. The meeting was to be from 8 AM to 3 PM, but we were slow getting around, and my wife and I went to IHOP first, so I didn't get there until 10:30 AM. The guys were nice, and I was finally able to watch several accomplished blacksmiths at work. As you might expect, the projects were smaller, since each one was supposed to be finished that day. I learned a few things, although all of the lessons were beyond my skill. I wasn't the only beginner there - I introduced myself to at least 2 others that were first-time attenders. I joined up and purchased a swage block, even though I don't have a forge yet.
Lessons:
- Experts recommend that you move the metal and swing the hammer in a steady arc, rather than chasing the metal across the anvil.
- Consider raising your anvil a few inches above your knuckle. The idea is to avoid locking out your elbow and straining the joint.
- Don't hold your hammer in a death grip - just hold it tight enough to keep it under control. And don't put your index finger or your thumb on top of the hammer like you are pointing - just wrap them around.
- Tap gently to forge weld. Either use a light hammer or gentle blows.
- Leave your metal thick while sculpting the rough shape of the object, then taper - to avoid having your project crack or break in two (no, this didn't happen, but I picked it up from conversation).
Here are some pictures and comments. The images were taken on a Fuji A302, and are numbered exactly as I took them. If you want a hi-res image, just click on the photo.
| Photo | Comment |
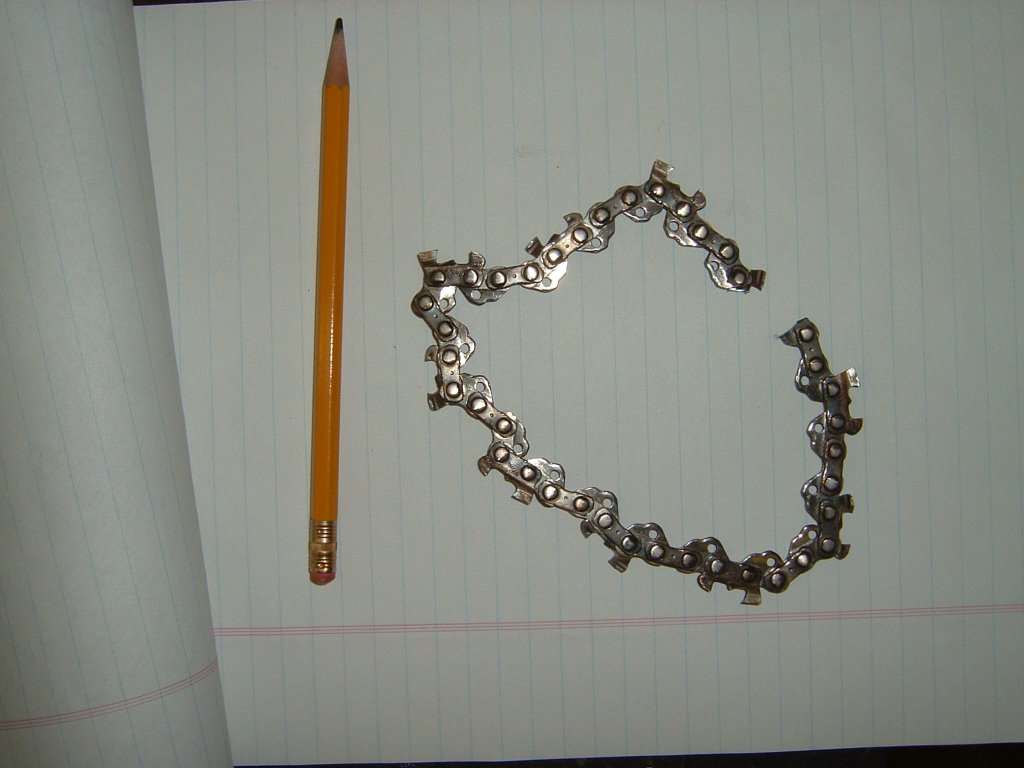 | Sample of the original chain from 16 inch chain saw. |
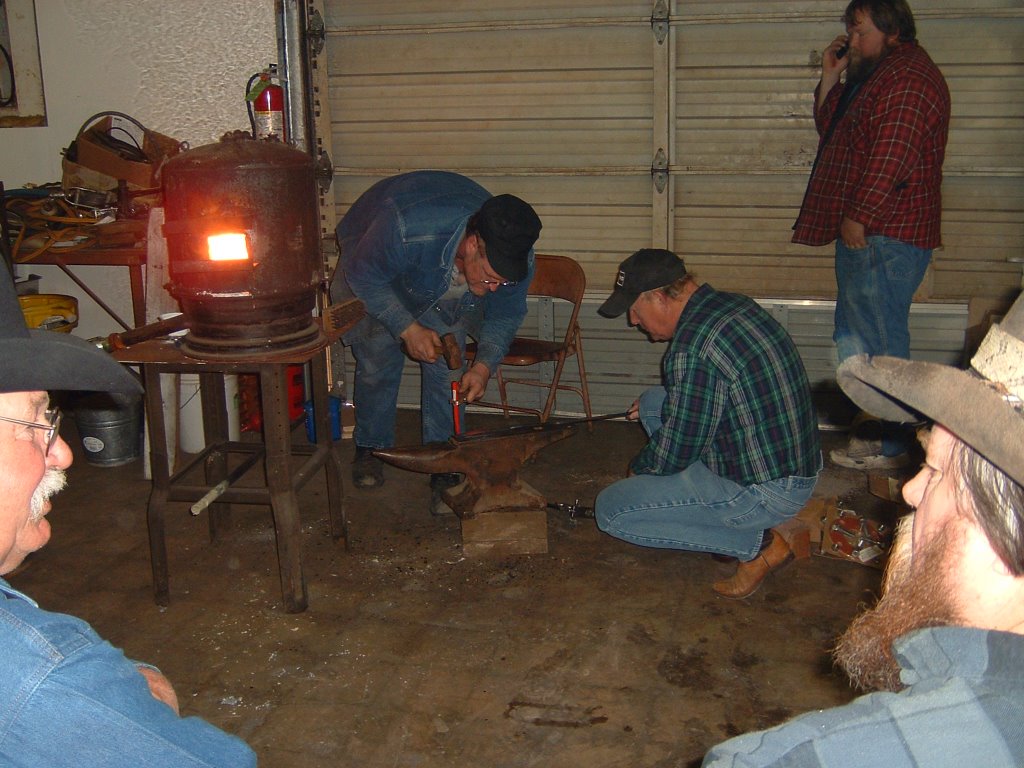 | Mike Sweeney (left) working chain saw chain into a butter spreader. Mike McCallum is assisting. Keith Potts (red checkered shirt) is observing. |
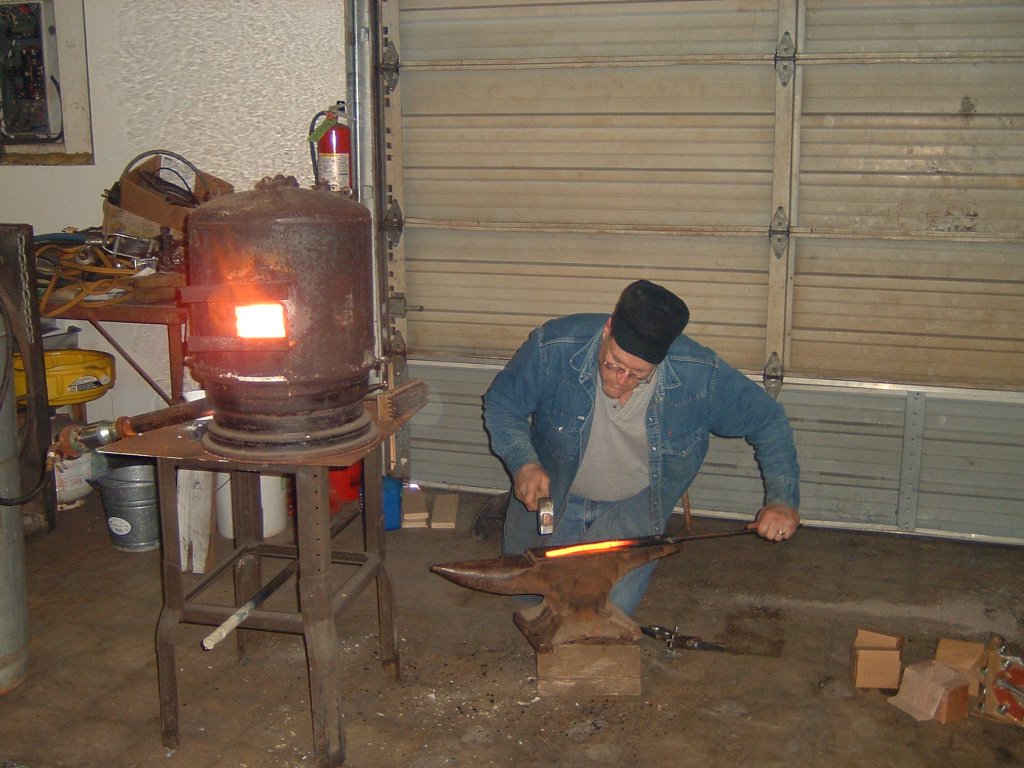 | Mike Sweeney - Butter Spreader. |
 | Mike Sweeney - Butter Spreader. |
 | Mike Sweeney - Butter Spreader. |
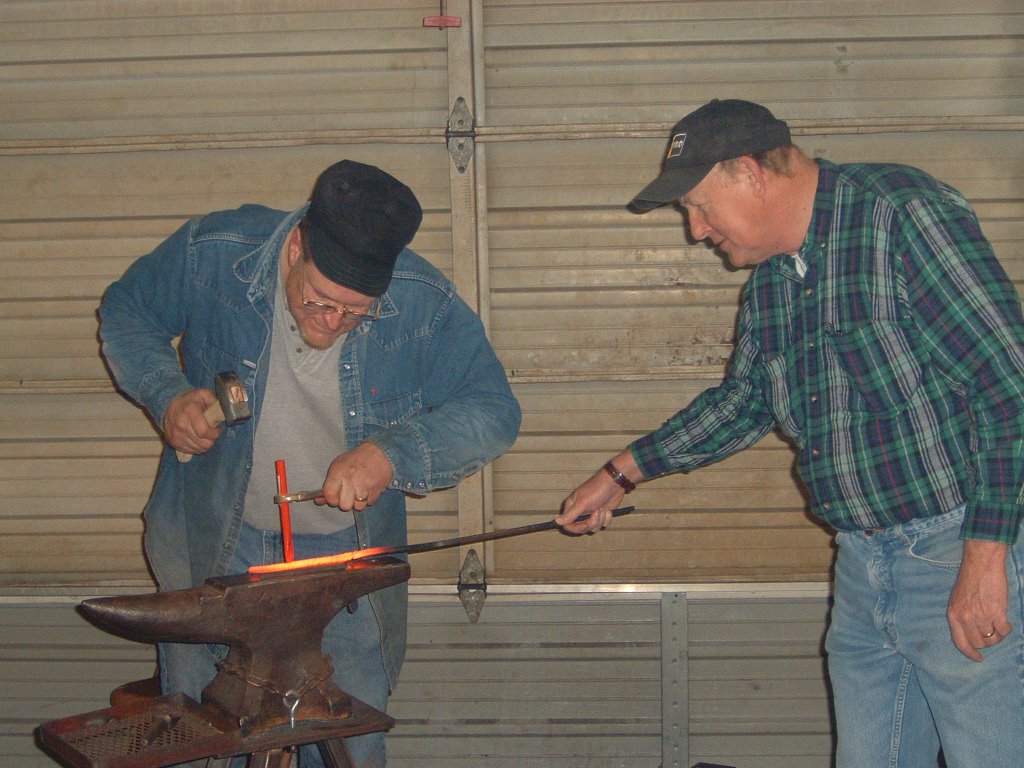 | Mike Sweeney and Mike McCallum - Butter Spreader. |
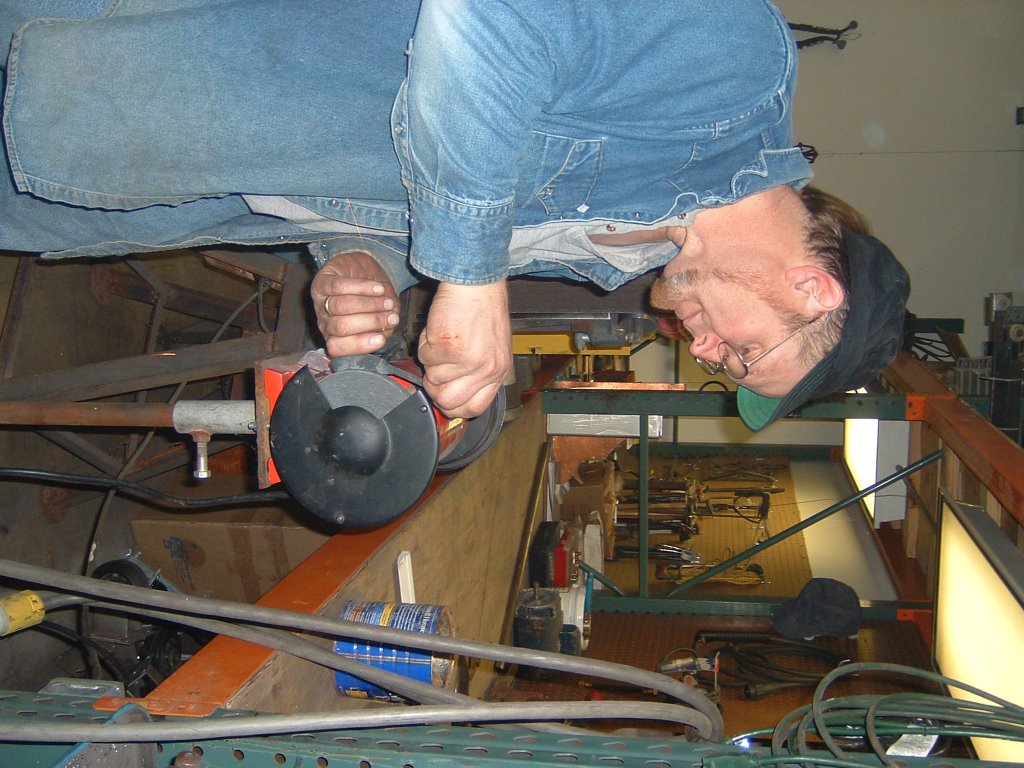 | Mike Sweeney - Grinding the top of the blade. |
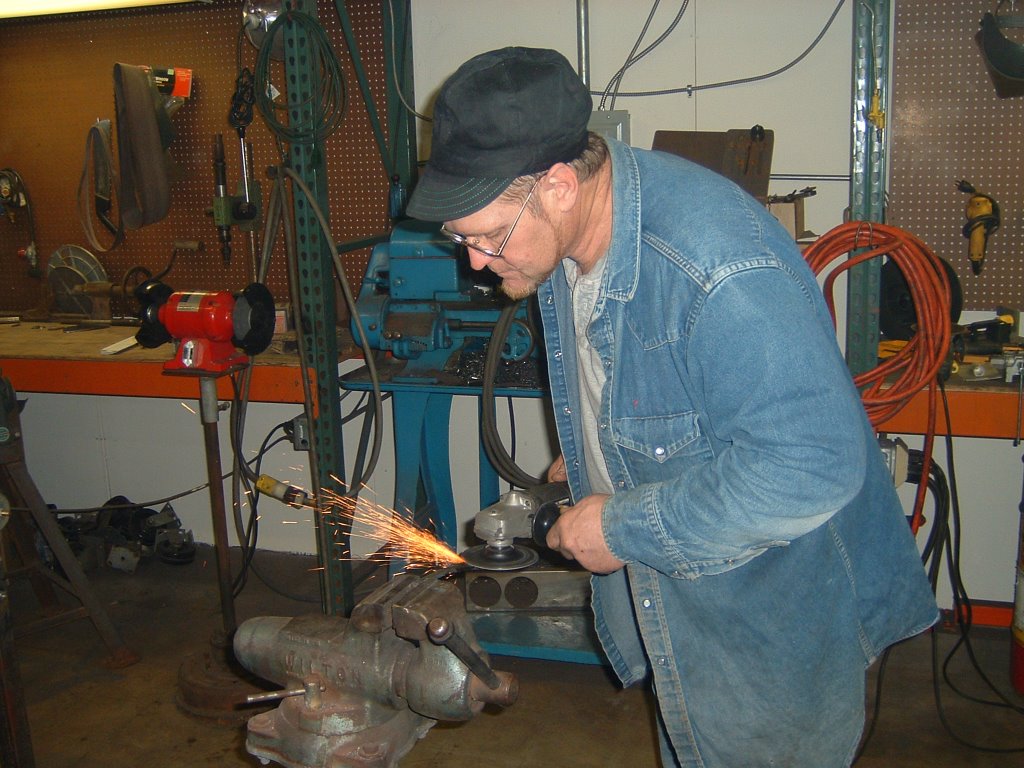 | Mike Sweeney - Grinding the blade surface, before acid etch. |
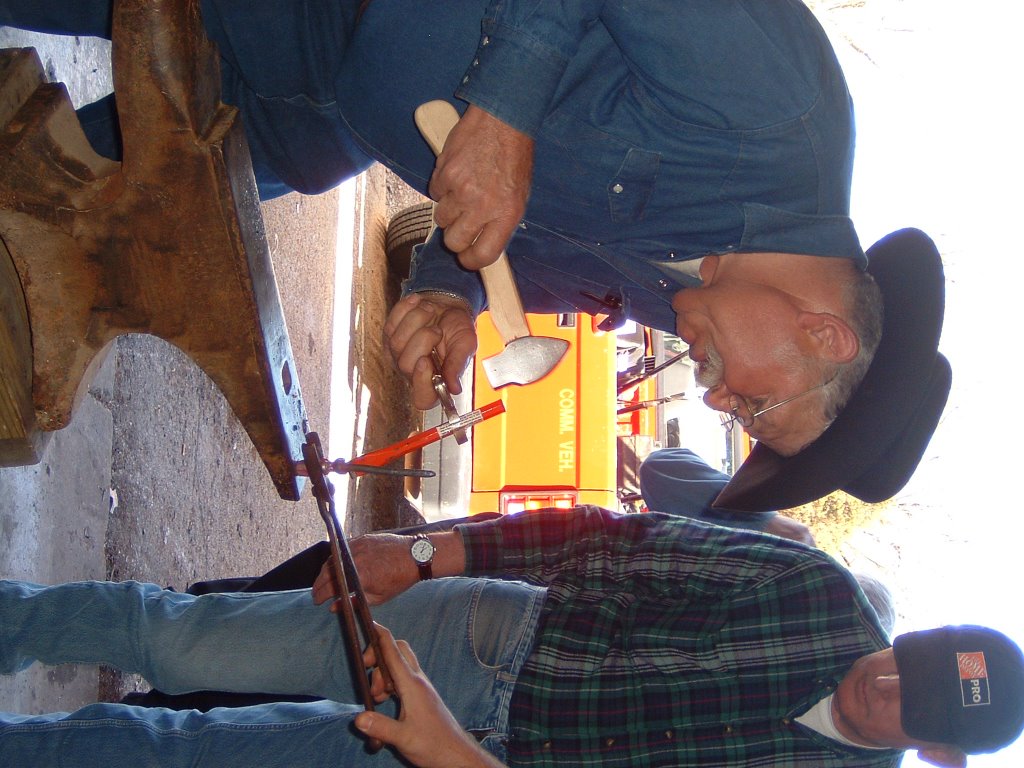
 | Ed Brazeal - Shaping a hand bell from 2.5 or 3 inch pipe. A single pipe is fullered and cut giving two bells. |
 | Ed Brazeal - Hand Bell |
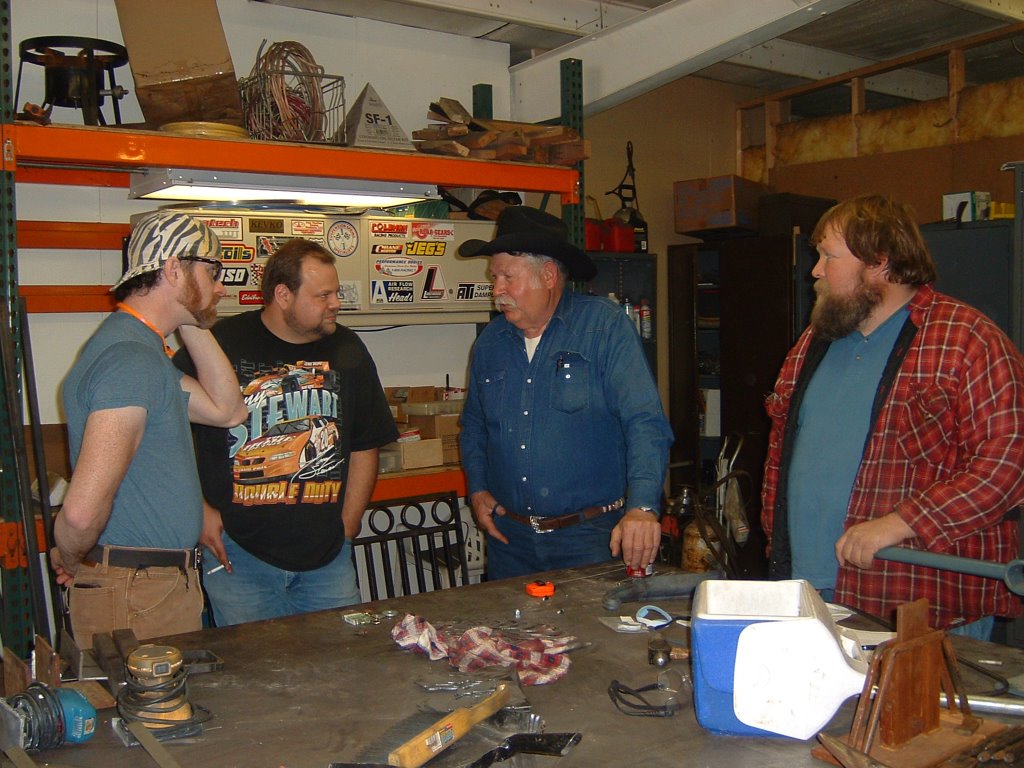 | Member discussion. ?? + Jeff + Ron + Keith. |
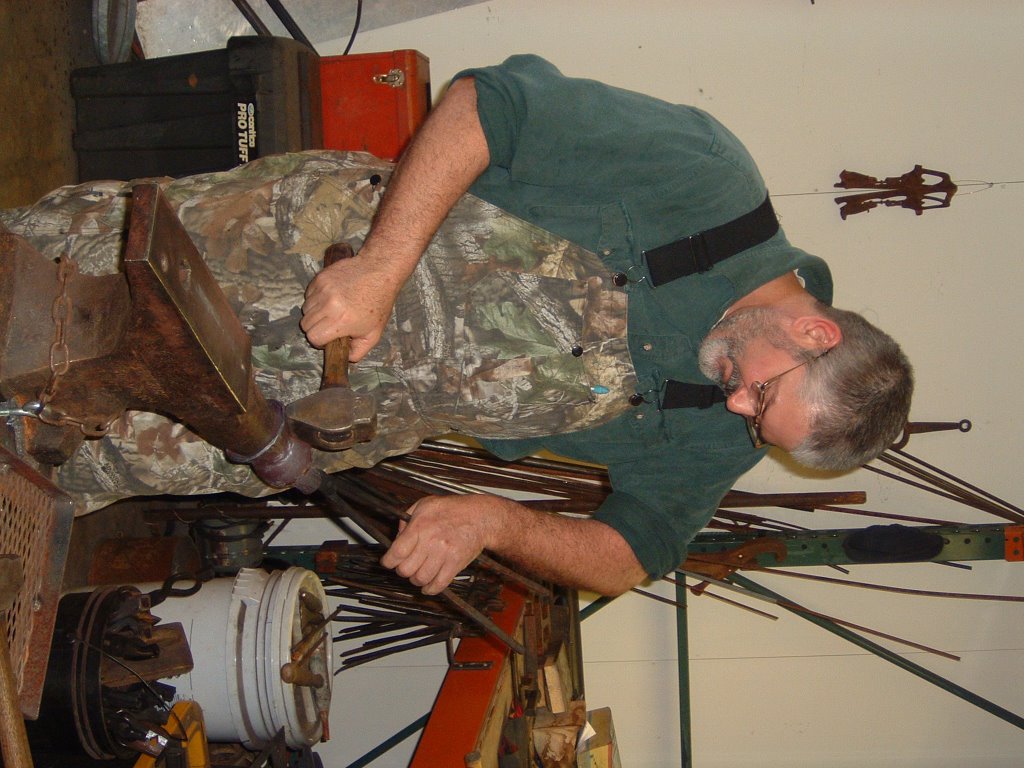 | Ed Brazeal - Hand Bell |
 | Ed Brazeal - Hand Bell |
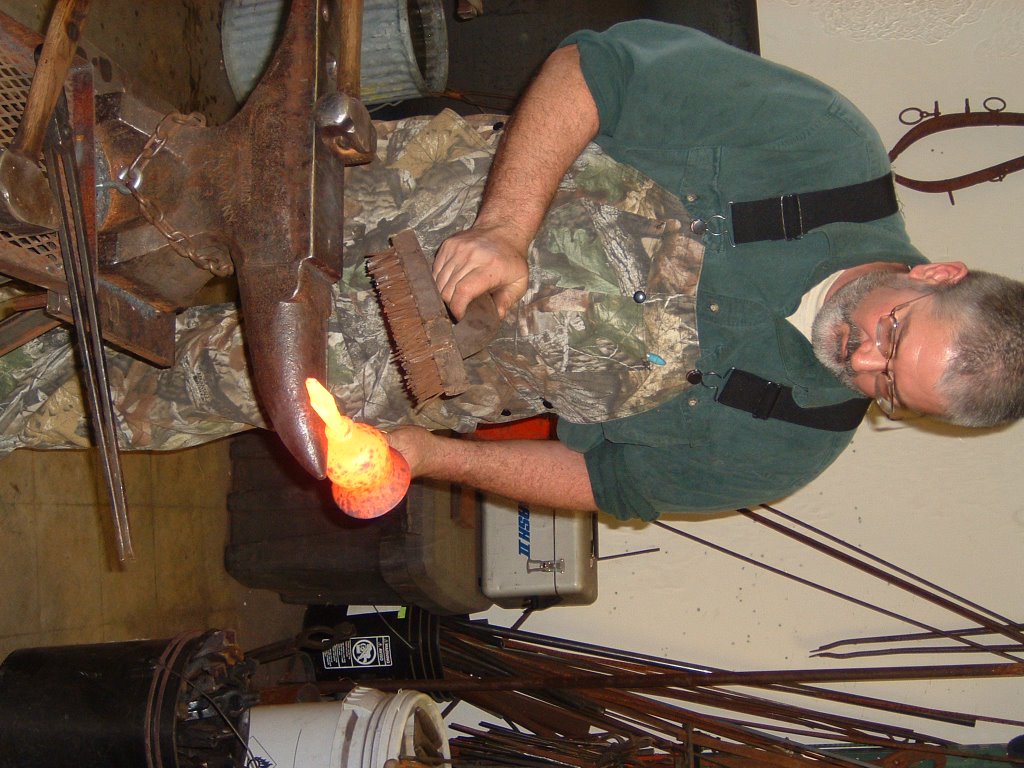 | Ed Brazeal - Hand Bell; trying to clean up and get welding heat to forge weld handle to bell |
 | Ed Brazeal - Hand Bell; trying to forge weld. I believe that Propane problems forced a braze. |
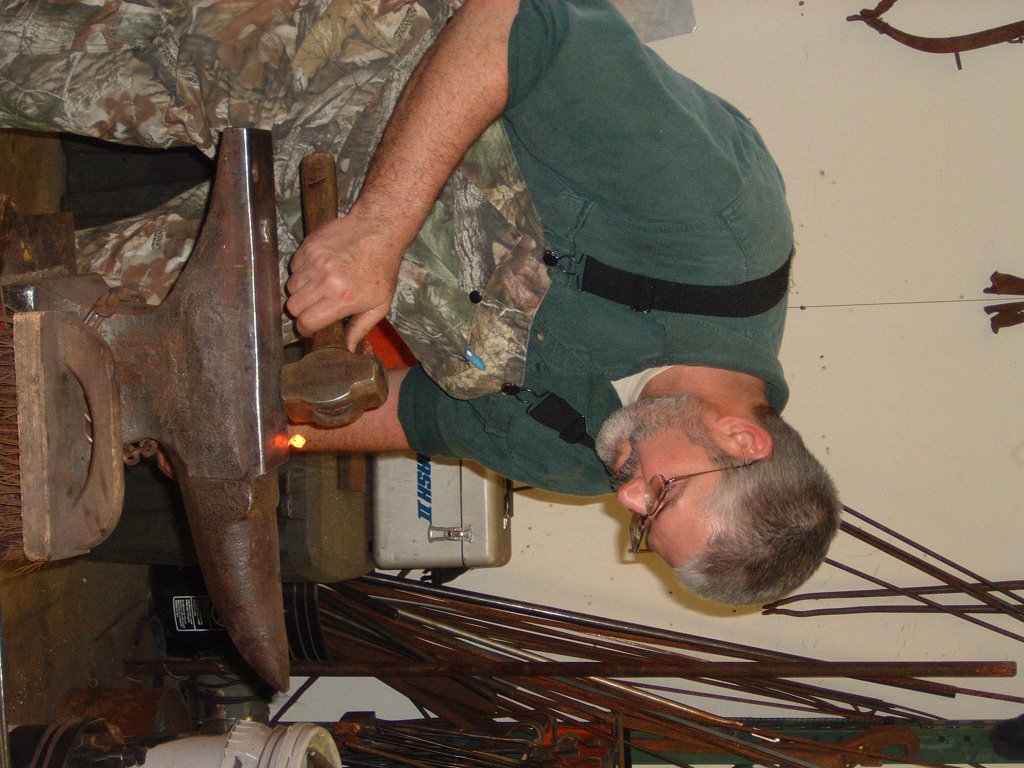 | Ed Brazeal - Hand Bell; shaping the clapper. |
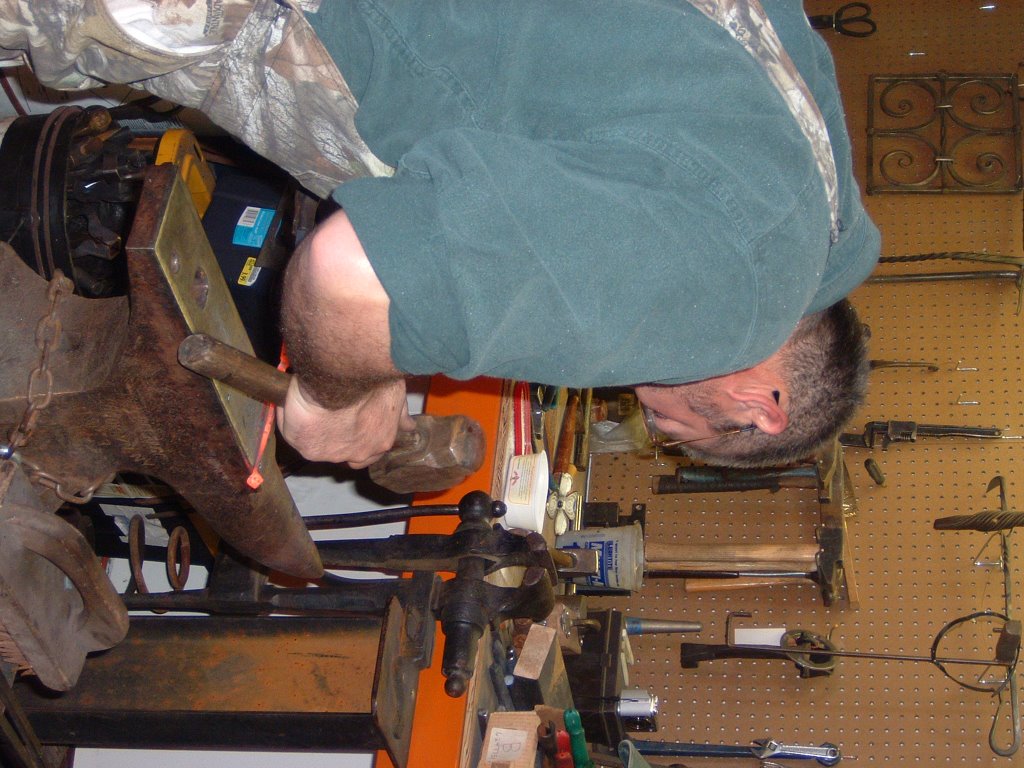 | Ed Brazeal - Hand Bell; shaping the clapper. |
 | Ed Brazeal - Hand Bell; cutting off the clapper on the "hot cut" in the hardie hole. |
 | Ed Brazeal - Hand Bell; shaping the attachment taper between the clapper and the handle. |
 | Ed Brazeal - Pie Server. |
 | Ed Brazeal - Pie Server. |
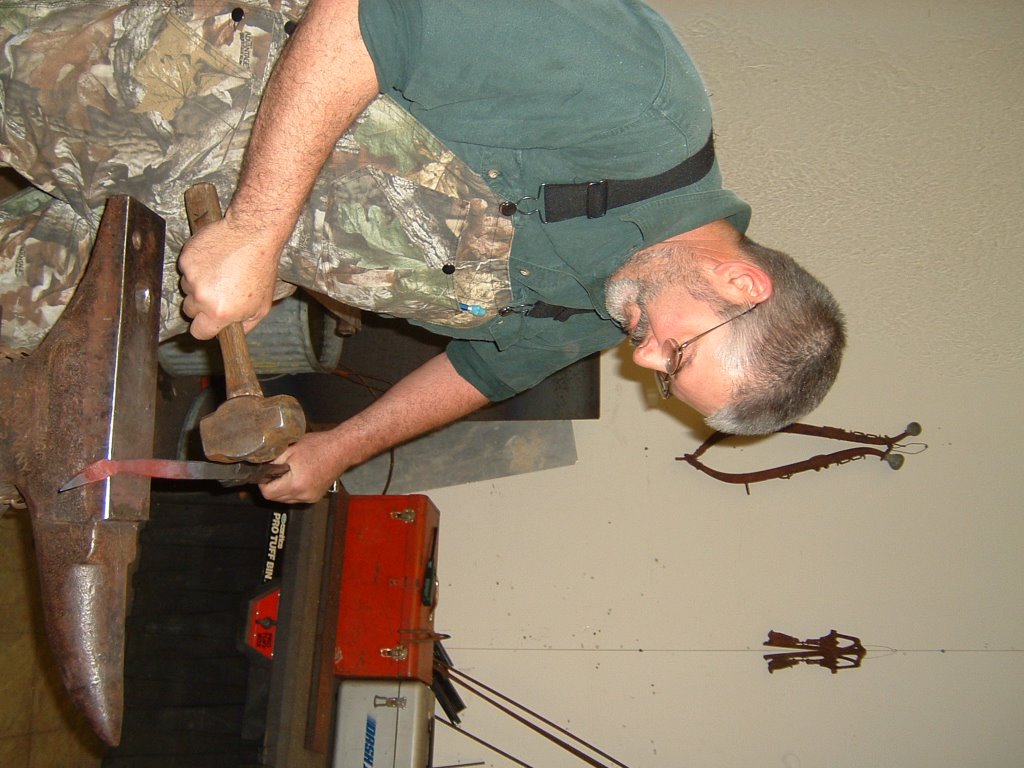 | Ed Brazeal - Pie Server. |
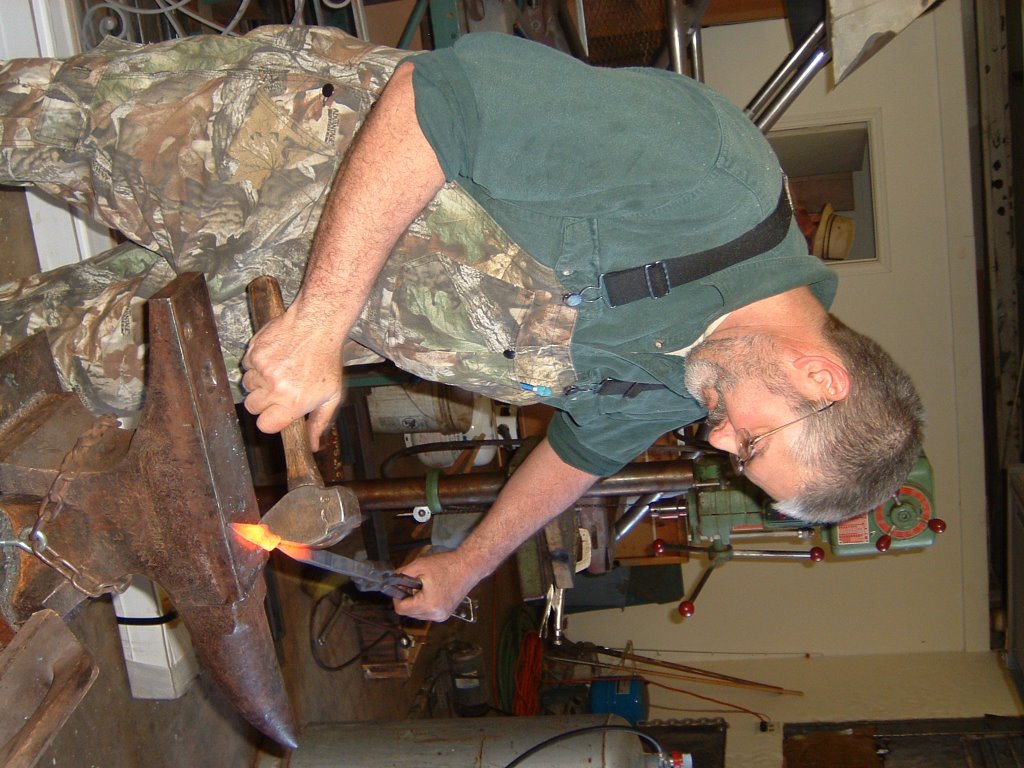 | Ed Brazeal - Pie Server. |
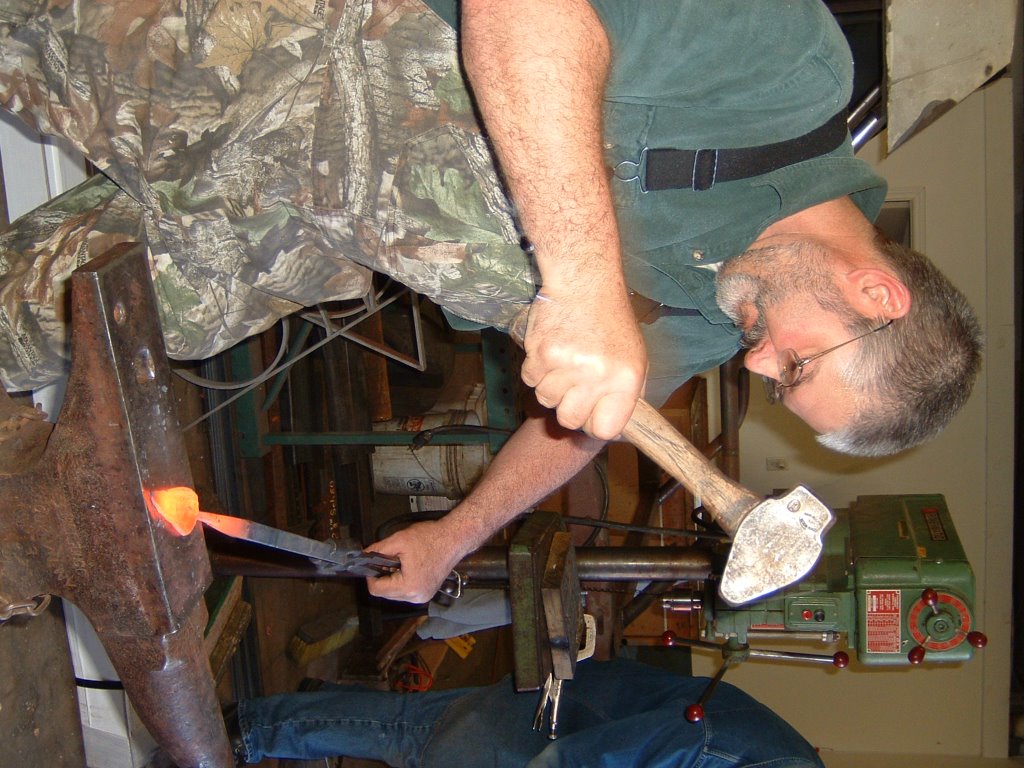 | Ed Brazeal - Pie Server. |
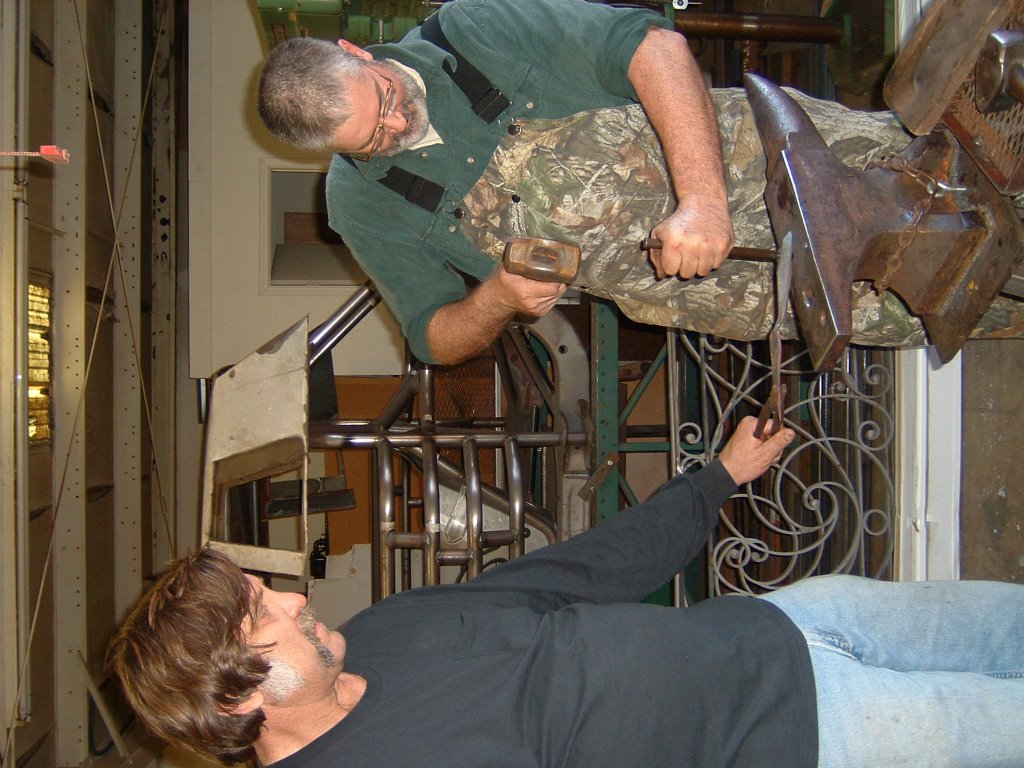 | Ed Brazeal - Pie Server; punching a hole in the handle. |
 | Ed Brazeal - Pie Server; cleaning off the scale |
 | Ron Lehenbaur - Pepper; cutting with Chisel, assisted by Mike |
 | Ron Lehenbaur - Pepper; shaping with another member's guillotine tool, assisted by Mike |
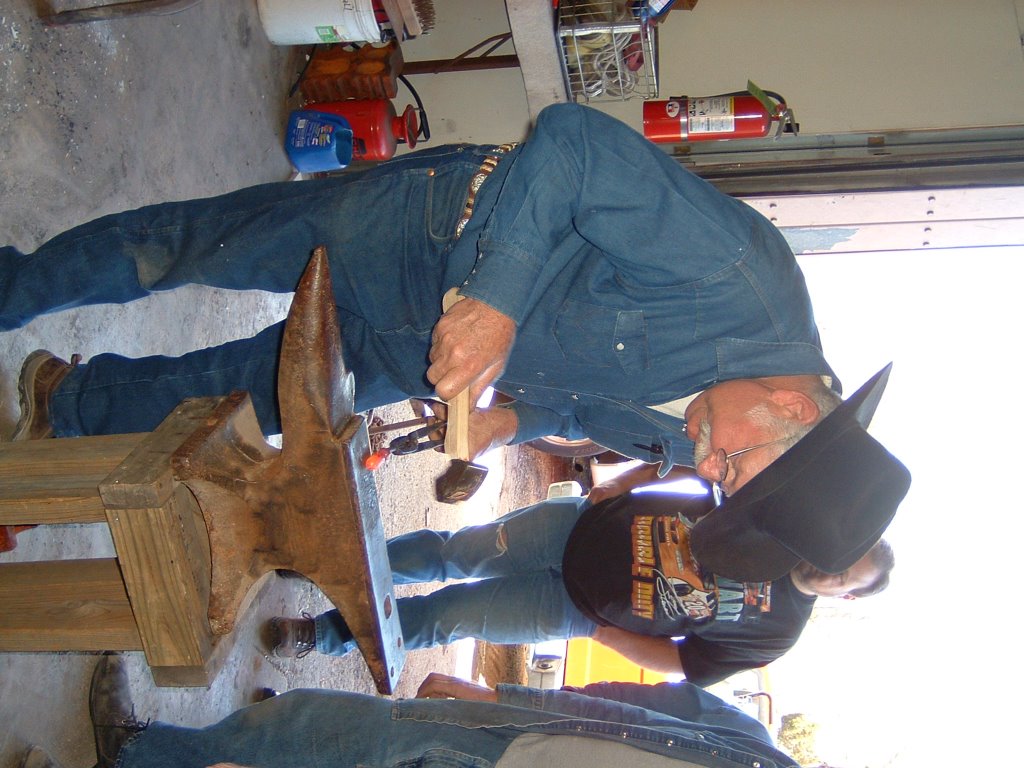 | Ron Lehenbaur - Pepper |
 | Ron Lehenbaur - Pepper |
 | Ron Lehenbaur - Pepper; splitting the leaves off of the top |
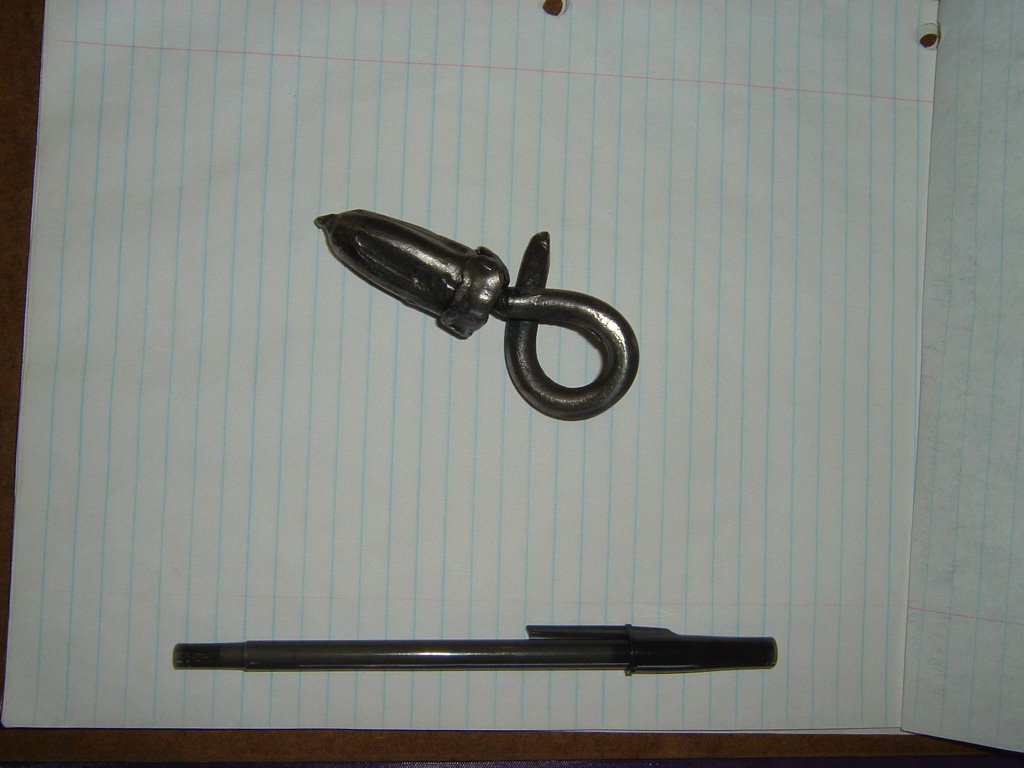 | Ron Lehenbaur - Pepper; finished product. Stem is too thick, and only 4 leaves, but clean work. |
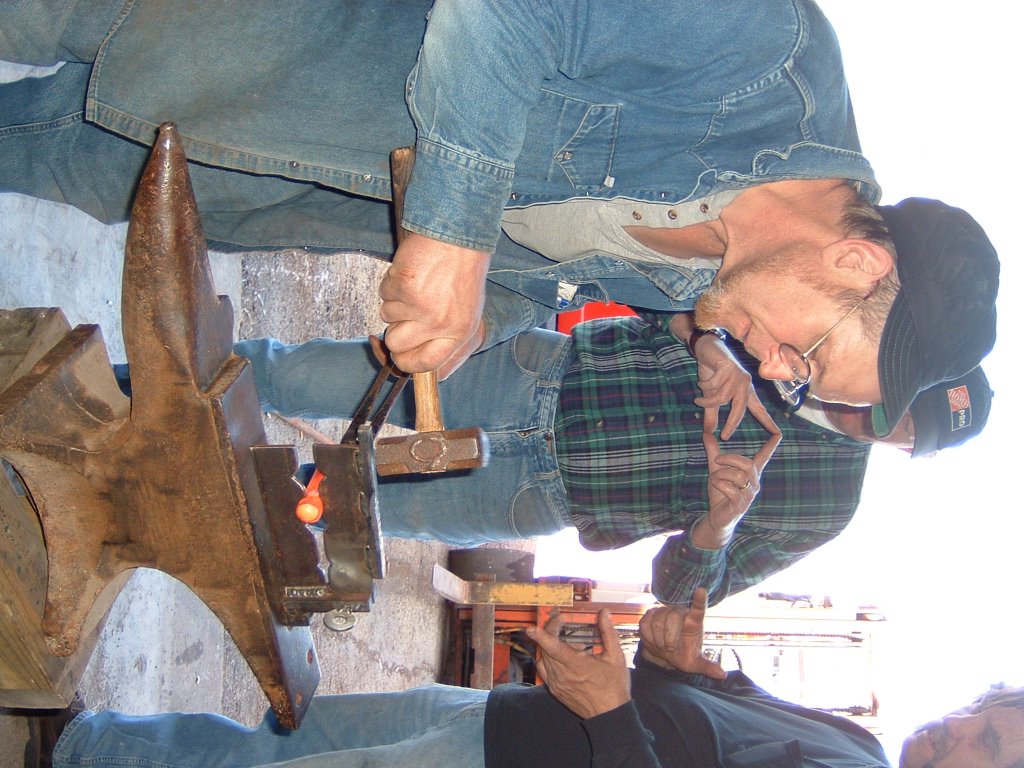 | Mike Sweeney - making a very small bell from ?1 inch? tubing. |
 | Metal Tripod Anvil Stand |
| Simple 2x4 Anvil Stand. Needs cross-bracing. As it is, it wobbles. |
January 13, 2006
Scrounging for tools
When I started working in earnest to become a hobby blacksmith, I studied all of the books in the library and many pages on the internet first. Then I started talking to friends, neighbors, mechanics, welders, and even one student at a local technical school (they are always looking for projects). My dad gave me a small hammer head, and loaned me a small anvil with a nice flat face, and a good edge. A friend found me 4 free racks made out of steel tubing, with plywood shelves. At a garage sale, I bought a 140 lb anvil for $10.00 USD, and he threw in a few pieces of metal and a small tack barrel too! A co-worker gave me a 55 gallon drum so I could carry and store coal. My mechanic rescued a car drive-shaft. Friends can not turn you into a blacksmith, but if you make an honest effort, are patient and study the available books, you can get there. I think this is obvious, but I will say it anyway ... books won't make you a blacksmith. Your best bet is to join a local blacksmithing organization. You can probably find a local group by searching the ABANA Chapter site hosted by AnvilFire.com.
With all of the hauling that I have been doing lately, I have been thinking of installing some U-bolts in the four corner posts of my pickup bed. Then I can tie ropes in a criss-cross to firmly anchor wood, iron or a 55 gallon drum full of coal.
All I need before I can start heating metal is an anvil stand and a coal forge. I know that a tree stump is traditional, but I am also considering fabricating an anvil stand from some angle and tubular iron, with a re-bar tool rack on one side. I have located a car brake drum, but I am still looking for a truck brake drum or other suitable fire pot, some fire brick, and some plate or sheet metal to hold coal reserves.
On the net, I have found the following Brake Drum Forge links:
http://www.anvilfire.com/21centbs/forges/brkdrum1.htm
http://www.vikingmetalworks.com/firepot.html
http://www.knifenetwork.com/workshop/tut_coal_forge_warner.shtml
http://www.geocities.com/Heartland/Lake/7316/brake.html
http://homepage.mac.com/dbrock76/Personal40.html
What should my first project be: a fire poker, tongs, a hardie hot-cut, a chisel, a drift, or something else? Any good links to a fire poker? If I build tongs, what size should the jaws be?
Oh, and notice that my project list did not include a sword. Honestly, I have no intentions of ever making one. I might make a hunting knife in a few years, as my brother-in-law mentioned it, but it will have to wait until I build up some skill.
With all of the hauling that I have been doing lately, I have been thinking of installing some U-bolts in the four corner posts of my pickup bed. Then I can tie ropes in a criss-cross to firmly anchor wood, iron or a 55 gallon drum full of coal.
All I need before I can start heating metal is an anvil stand and a coal forge. I know that a tree stump is traditional, but I am also considering fabricating an anvil stand from some angle and tubular iron, with a re-bar tool rack on one side. I have located a car brake drum, but I am still looking for a truck brake drum or other suitable fire pot, some fire brick, and some plate or sheet metal to hold coal reserves.
On the net, I have found the following Brake Drum Forge links:
http://www.anvilfire.com/21centbs/forges/brkdrum1.htm
http://www.vikingmetalworks.com/firepot.html
http://www.knifenetwork.com/workshop/tut_coal_forge_warner.shtml
http://www.geocities.com/Heartland/Lake/7316/brake.html
http://homepage.mac.com/dbrock76/Personal40.html
What should my first project be: a fire poker, tongs, a hardie hot-cut, a chisel, a drift, or something else? Any good links to a fire poker? If I build tongs, what size should the jaws be?
Oh, and notice that my project list did not include a sword. Honestly, I have no intentions of ever making one. I might make a hunting knife in a few years, as my brother-in-law mentioned it, but it will have to wait until I build up some skill.
January 08, 2006
New Anvil
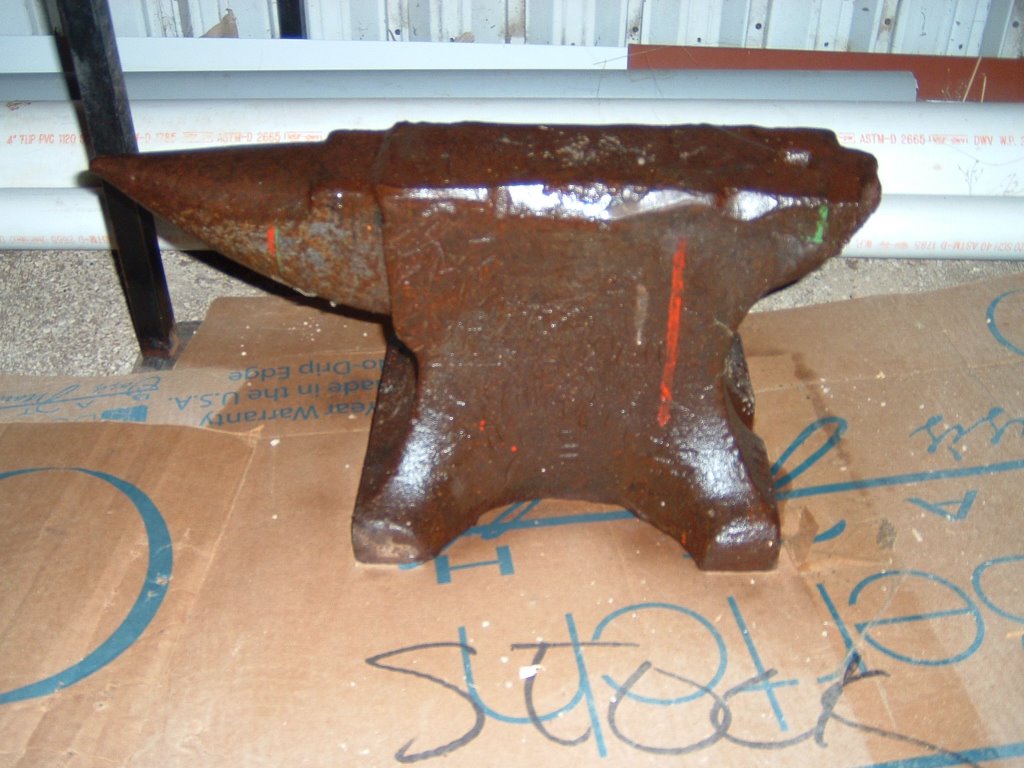
As you can see from this photo ... I have an anvil. I suspect that it is a cheaper anvil, but it does have a hardie hole. It is really chewed up, but it only cost me $10! I went over to a garage sale, and as soon as we walked up, the man said "You don't want an anvil, do you?" While we were there, he gave me a piece of shackle rod and a small barrel with re-bar legs that I might be able to add fire-brick and clay to make into a forge.
If you notice a shiny look to the anvil, it was a bit rusty, so I sprayed it down with penetrating oil. After I wipe the oil off, I'll look it over carefully, and decide whether I want to have it milled flat, or just to grind it smooth myself (much less accurate, but cheaper). The face is very scarred up, with chunks missing off of the heel, and a file says that it is at least medium hardness. I'm just hoping it is not an "Anvil Shaped Object". The only identifying marks on the anvil are "113" in raised letters on the waist, and possibly another inscription right above one of the feet. It has about a 7/8 inch hardie hole. and no pritchel hole (this was probably on the part of the heel that broke off). Also, below the hardie it has a large "12" in raised letters. The dimensions are 19.5 inches long x 9.5 inches high x 4.125 inches wide.
Update: I did a bounce test with a 2 lb hammer, but I couldn't reliably interpret the results. And if this anvil uses the English Hundredweight system, 113 = 1 * 112 + 1 * 28 + 3 * 1 = 143 pounds (minus material lost on the heel)! I am having some doubts about the barrel mini-forge ... I will have to discuss this one with some REAL blacksmiths.
January 06, 2006
Dressing up a chinese hammer

I know that I should hang my head in shame for buying cheap chinese cross-pein hammers, but I bought a 2 lb and a 4 lb hammer. One look at the head or the pein would tell you that they are not blacksmithing hammers, so I will have to dress them up some.
As purchased, here is what the 4 pounder looks like:
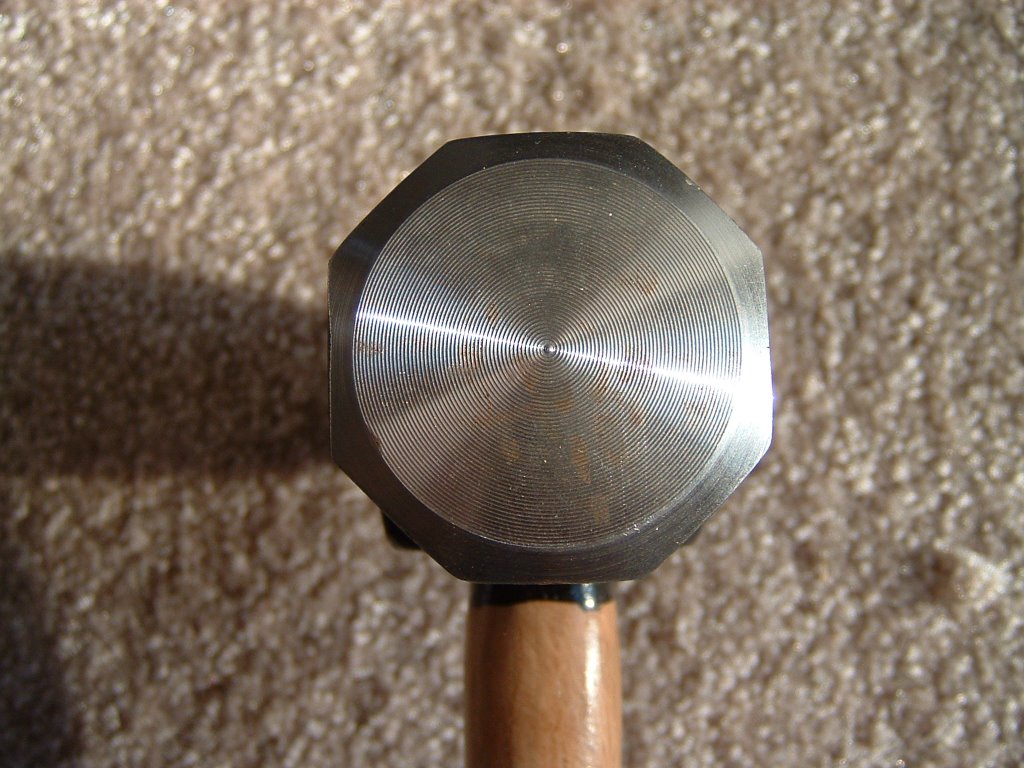
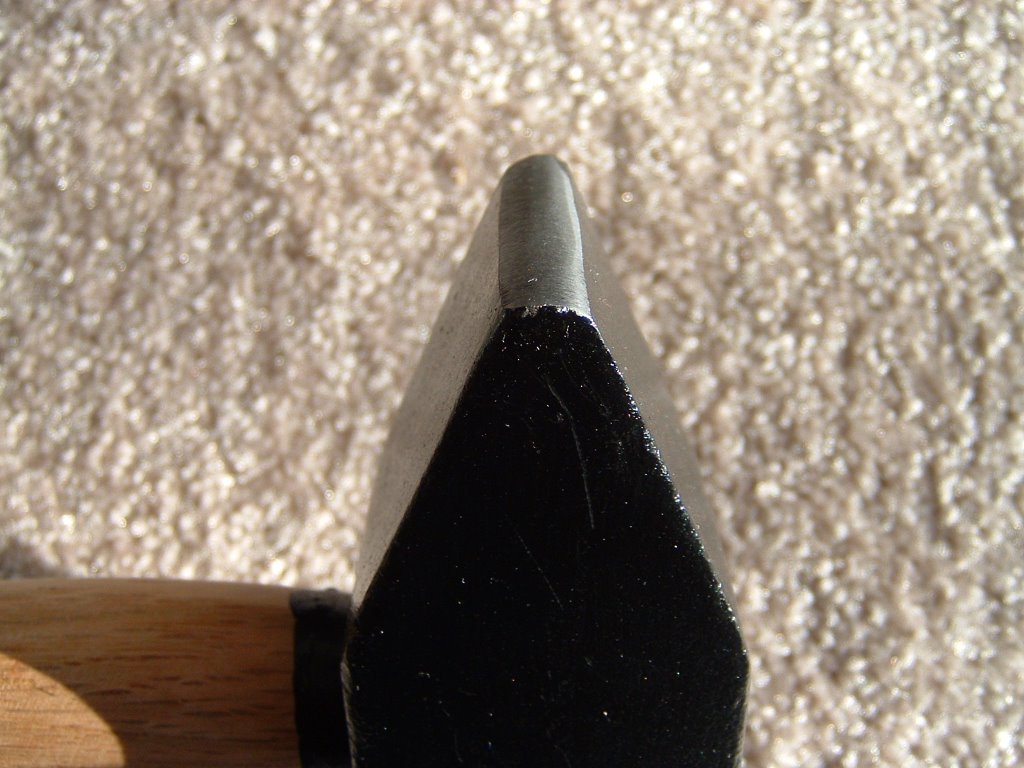
It is obvious from the photos that these hammers need work! Otherwise, I can only imagine the ugly ridges and dents that would show up in my work. I found a good hammer shape reference on the Artist-Blacksmith Quarterly website, although I haven't worked the pein into such an extremely rounded shape yet.

After filing the ridges off of the head, and removing some of the sharpness from the edges ...
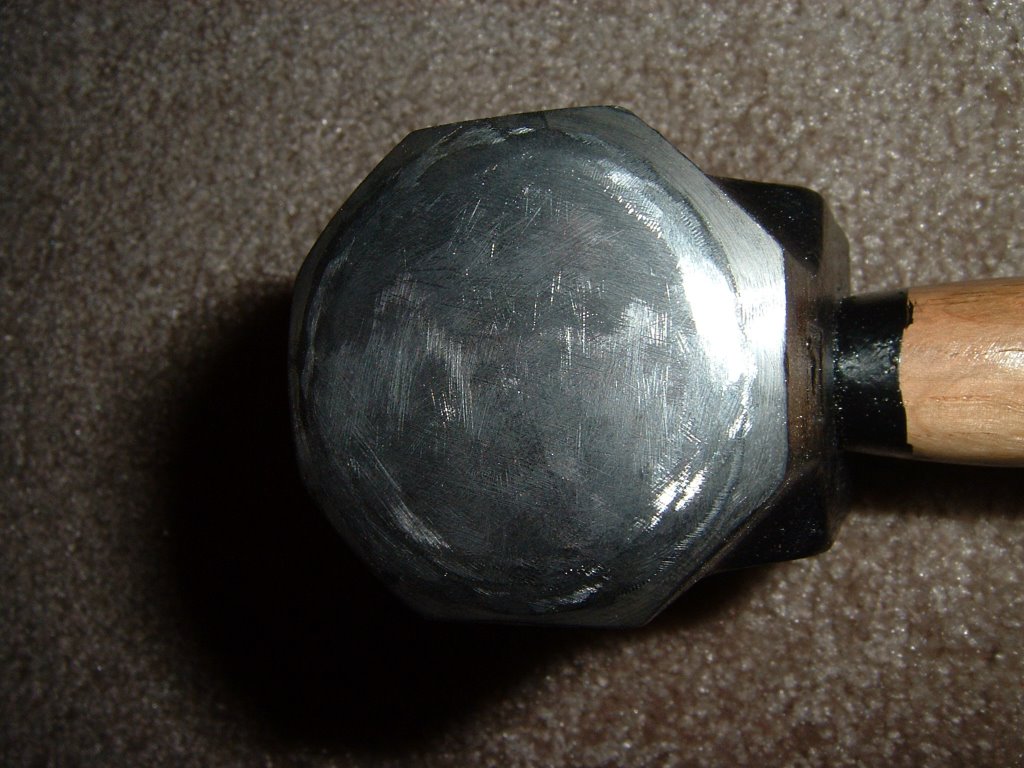
After rounding the pein a bit ... The hammer was labeled "Drop Forged Steel", but it was fairly soft and easily worked with a file. I don't think you want a particularly hard hammer face, because if the head was brittle and shattered, it could hurt alot! By the way, there is a real ART to using a file, and I am not one of those artists.

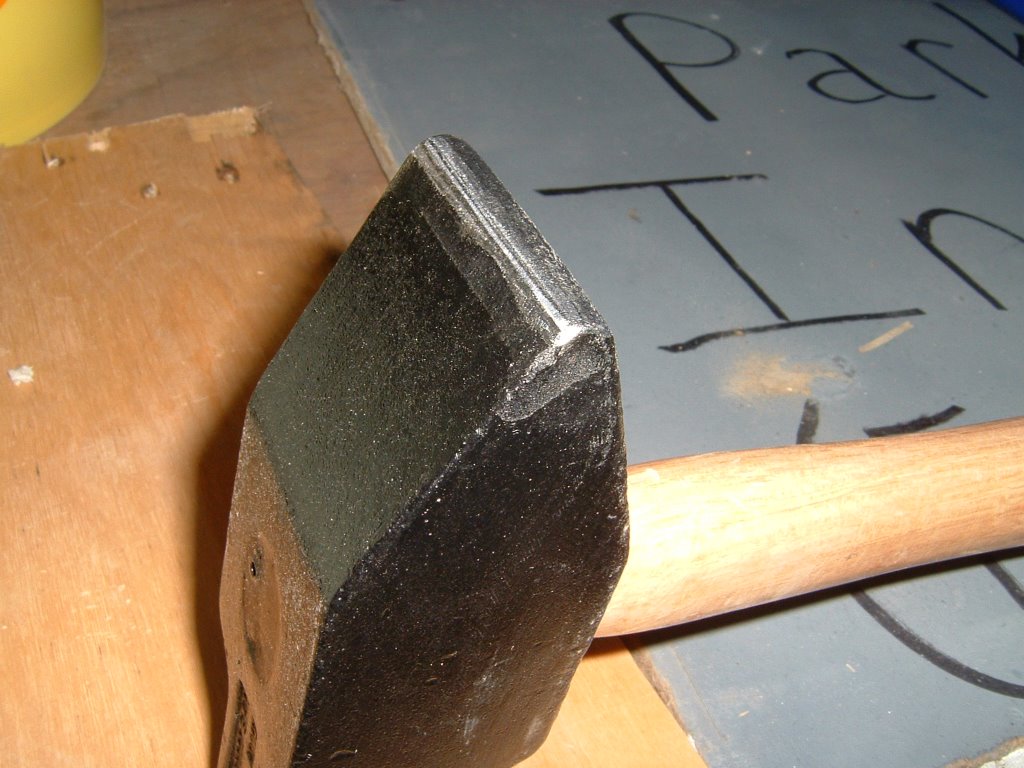
Once I start using my hammers in earnest, I'll have a better idea of whether they need more work. I am planning to go to the next Saltfork Craftsmen's meeting in Tulsa Oklahoma. It's an all-day event with several demonstrations. I'll take pictures and keep you posted.
January 02, 2006
Why Blacksmithing?
Recently, my brother-in-law asked me "Why do you want to learn blacksmithing?" Since I have moved back to the country, I know I will need to be able to cut and weld iron for gates, fence corners, etc. And, we have a lot of limestone rock in our area, so I will probably try my hand at shaping a few rocks - squaring corners, flattening sides, etc. With blacksmithing skills, I will be able to build tools instead of buying them - where it makes sense. The complete modern blacksmith has instructions on how to build rock shaping tools.
But what really attracts me to the craft is "permanence." If I make something with my own two hands that it is functional and useful, someday my children might be able to tell their friends "Yeah, my dad made that."
I hope to locate some information on forging stainless steel, so I can (eventually) make some kitchen items for my wife. If anyone has information to share, leave a comment, or check my first post for contact information.
But what really attracts me to the craft is "permanence." If I make something with my own two hands that it is functional and useful, someday my children might be able to tell their friends "Yeah, my dad made that."
I hope to locate some information on forging stainless steel, so I can (eventually) make some kitchen items for my wife. If anyone has information to share, leave a comment, or check my first post for contact information.
January 01, 2006
Care and feeding of a hammer
This weekend, I was over to my dad's house, to pick up a small anvil. When I was about 10 years old, I remembered it as a fairly large anvil, requiring two hands to lug it around, now I discover that it was maybe 18 lb! The anvil was made from a short piece of railroad track with a small block of metal above that, a flattened piece of road-grader blade for a top, and a crudely shaped horn. I have read that the recommended hammer-to-anvil ratio is 30:1, so this anvil should be used with an 8 oz hammer. While we were walking through the shop, I saw a ball-pein hammer head laying on the shop's dusty concrete floor. I asked if I could borrow it, and he gave it to me. It was smaller than my 32 oz hammer, so it might be more suitable to my very small anvil.
If you remember from my first post, I only have one suitable hammer - a 32 oz ball-pein. My latest discovery is a 16 oz ball-pein with a few pock marks on one side, but in very usable condition. I wiped some Remington fine-parts oil on it, and slowly worked the oil into every crevice. I could tell by looking at my rag that I was making progress, and after wiping it down, It almost shone! It wasn't "like new" but it looked a lot better. The hardest place to clean was inside the oval hammer hole, but when I get a good handle, I want it to fit snug, so I kept at it.
One book that I read, "The Complete Blacksmith," recommends making your own handles, but I don't have any hardwood stock laying around, and I don't have a lathe. I'll just go by Atwoods sometime next week.
I guess my message to my reader is - wipe down your tools. If you have a shovel, wipe off the dirt, then put any kind of oil on it, and wipe the metal part with a rag. Don't oil the wooden parts though!
If you remember from my first post, I only have one suitable hammer - a 32 oz ball-pein. My latest discovery is a 16 oz ball-pein with a few pock marks on one side, but in very usable condition. I wiped some Remington fine-parts oil on it, and slowly worked the oil into every crevice. I could tell by looking at my rag that I was making progress, and after wiping it down, It almost shone! It wasn't "like new" but it looked a lot better. The hardest place to clean was inside the oval hammer hole, but when I get a good handle, I want it to fit snug, so I kept at it.
One book that I read, "The Complete Blacksmith," recommends making your own handles, but I don't have any hardwood stock laying around, and I don't have a lathe. I'll just go by Atwoods sometime next week.
I guess my message to my reader is - wipe down your tools. If you have a shovel, wipe off the dirt, then put any kind of oil on it, and wipe the metal part with a rag. Don't oil the wooden parts though!
December 29, 2005
Preparing for the craft
At this time, I am not even a beginner blacksmith. I am merely preparing for it. I am gathering up the bare necessities though. I have read all 3 books offered by our library:
The art of blacksmithing / Alex W. Bealer.
Practical blacksmithing / Edited by M. T. Richardson.
The complete modern blacksmith / Alexander Weygers.
Of these books, the first two are mostly intended for an intermediate or advanced blacksmith, and the third one could almost be used by a beginner. The only thing I have against "The complete modern blacksmith" is that he recommends removing safety guards on your grinder, and doesn't (that I know) mention "Metal Fever." Please research metal safety if you plan to work with metal. For those who have recently been exposed to metal vapors, I have heard that whole milk, real butter and other fatty foods can help a little bit. I am not a doctor, and this does not mean that you should be careless with metal vapors. Be safe or you could die.
I intend to read "The new edge of the anvil" as I hear that it is an excellent beginners book ... we shall see.
As for tools, I have:
A few items that I still need are:
My dad has a small (maybe 20 lb) anvil that I can use until something better comes along, and I will be getting a nice swage block from the Oklahoma-based Saltfork Craftsmen Artist-Blacksmith Association. They have a 65 lb swage block for a good price. They also sell coal, which I will be using when I get or make a forge.
I have read recommendations that I should take a welding course, for the safety training, and so I could weld things together ... like a nice metal project table. Our local tech school offers evening courses in welding, but they are a bit expensive - $350.00. I guess I'll have to read a welding book and then have my brother give me a few pointers. My brother recommended that I learn oxy-acetylene welding, since that is closest to the process of forge welding. It would also be useful as a localized heat source for things that will not fit into the forge.
I know that some blacksmiths are "purists" in the sense that they want to preserve the old ways, and I very much respect that, but I don't have the luxury to avoid modern welding and grinding tools right now. After I have a shop with a few of tools, I will be able to drift and punch instead of drilling, and forge weld instead of oxy-acetylene stick welding.
Stay tuned, as my next blog will probably address the question "Why I want to learn blacksmithing?"
Does anyone have book recommendations for a beginner?
you can either leave a comment, or write me at roy_tate [at] yahoo [dot] com.
Updated: Added to my list of "tools I have", added safety links.
The art of blacksmithing / Alex W. Bealer.
Practical blacksmithing / Edited by M. T. Richardson.
The complete modern blacksmith / Alexander Weygers.
Of these books, the first two are mostly intended for an intermediate or advanced blacksmith, and the third one could almost be used by a beginner. The only thing I have against "The complete modern blacksmith" is that he recommends removing safety guards on your grinder, and doesn't (that I know) mention "Metal Fever." Please research metal safety if you plan to work with metal. For those who have recently been exposed to metal vapors, I have heard that whole milk, real butter and other fatty foods can help a little bit. I am not a doctor, and this does not mean that you should be careless with metal vapors. Be safe or you could die.
I intend to read "The new edge of the anvil" as I hear that it is an excellent beginners book ... we shall see.
As for tools, I have:
ear muffs
ear plugs
full-face safety shield
safety glasses (not shaded though)
2 lb ball-pein hammer
2 wire brushes
vice-grips
8 lb sledge hammer
3 inch bench vise (very cheap!)
a few cold chisels
a small punch[updated!]
a set of inside/outside curved metal dividers, with no ruler marks.
a metal tub for quenching
a 110 lb London-Pattern anvil[updated!]
55 gallon drum to haul and store coal
A few items that I still need are:
a leather apron
welding gloves (at least until I get some decent tongs)
2, 3, and 4 lb cross-pein hammers
a blacksmith's leg vise
a project table
a coal forge
My dad has a small (maybe 20 lb) anvil that I can use until something better comes along, and I will be getting a nice swage block from the Oklahoma-based Saltfork Craftsmen Artist-Blacksmith Association. They have a 65 lb swage block for a good price. They also sell coal, which I will be using when I get or make a forge.
I have read recommendations that I should take a welding course, for the safety training, and so I could weld things together ... like a nice metal project table. Our local tech school offers evening courses in welding, but they are a bit expensive - $350.00. I guess I'll have to read a welding book and then have my brother give me a few pointers. My brother recommended that I learn oxy-acetylene welding, since that is closest to the process of forge welding. It would also be useful as a localized heat source for things that will not fit into the forge.
I know that some blacksmiths are "purists" in the sense that they want to preserve the old ways, and I very much respect that, but I don't have the luxury to avoid modern welding and grinding tools right now. After I have a shop with a few of tools, I will be able to drift and punch instead of drilling, and forge weld instead of oxy-acetylene stick welding.
Stay tuned, as my next blog will probably address the question "Why I want to learn blacksmithing?"
Does anyone have book recommendations for a beginner?
you can either leave a comment, or write me at roy_tate [at] yahoo [dot] com.
Updated: Added to my list of "tools I have", added safety links.
Subscribe to:
Posts (Atom)